I got the original code for study, I organized it and many new features!
New on 20-oct-2024:
- Bluetooth disabled for a smaller sketch and power saving, it was just used to advertise IP;
- Press and hold the left button to swap the city name with the IP, release to restore;
- Press and hold the right button to sleep;
- During sleep, press the right button to wake up;
- Timeout to switch cities;
- Sleep timeout;
- Wake up timeout;
- Access the IP in your web browser on the same network to set timeouts, set to zero to disable it;
- At first time, access the AP IP and upload the files from files_to_upload folder, then configure your Wi-Fi.
-
Clone or download this repository to your local machine into the Arduino directory. REPO
-
Open with Arduino IDE or VSCodium (ou VSCode) with extensions vscode-arduino extension and vscode-cpptools.
-
Install library TFT_eSPI from the interface tools. For footer font fix, use this fork REPO
-
Configure TFT_eSPI editing file User_Setup_Select.h, where you need comment “#include <User_Setup.h>” and uncomment line for your device, just one line, for my case “#include <User_Setups/Setup25_TTGO_T_Display.h>” line.
-
Install library ArduinoJson from interface tools.
-
Update your ~/.arduino15/packages/esp32/hardware/esp32/2.0.14/boards.txt, where 2.0.14 is esp32 library version, about line 3425, with:
lilygo_t_display.upload.flags= lilygo_t_display.upload.extra_flags= lilygo_t_display.menu.PartitionScheme.default_16mb=16 MB SPIFFS (6.25MB APP/OTA/3.43MB SPIFFS) lilygo_t_display.menu.PartitionScheme.default_16mb.build.partitions=default_16MB lilygo_t_display.menu.PartitionScheme.default_16mb.upload.maximum_size=6553600 lilygo_t_display.menu.PartitionScheme.large_spiffs=16 MB Large SPIFFS (4.5MB APP/OTA/6.93MB SPIFFS) lilygo_t_display.menu.PartitionScheme.large_spiffs.build.partitions=large_spiffs_16MB lilygo_t_display.menu.PartitionScheme.large_spiffs.upload.maximum_size=4718592 -
Get your free API Key from https://openweathermap.org/.
8. Put your Wi-Fi name and password, plus your key that you got above:
|Name|Description|
|----|-----------|
|ssid|Name of the WiFi network|
|password|WiFi password|
|key|Open Weather API key|
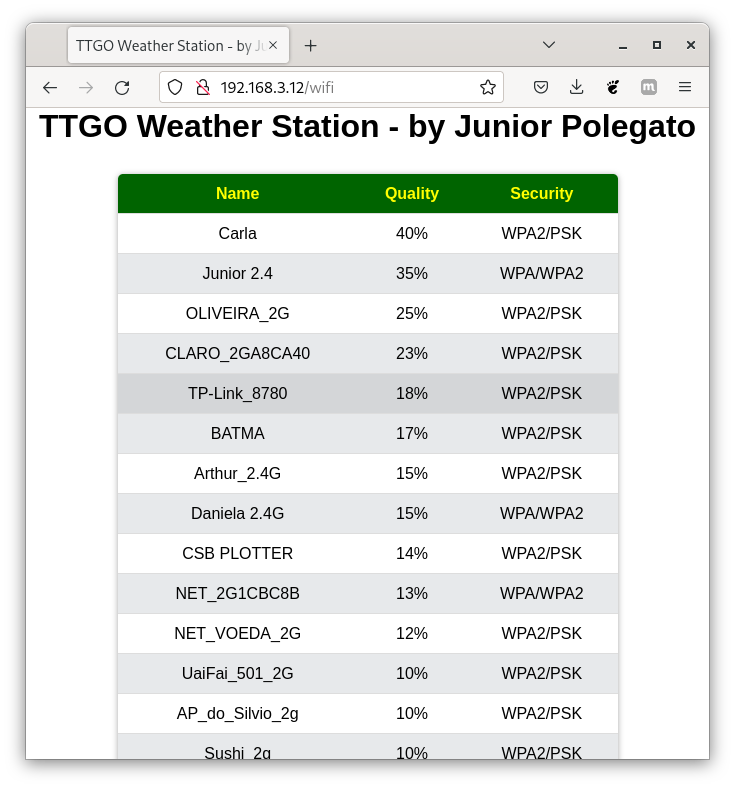
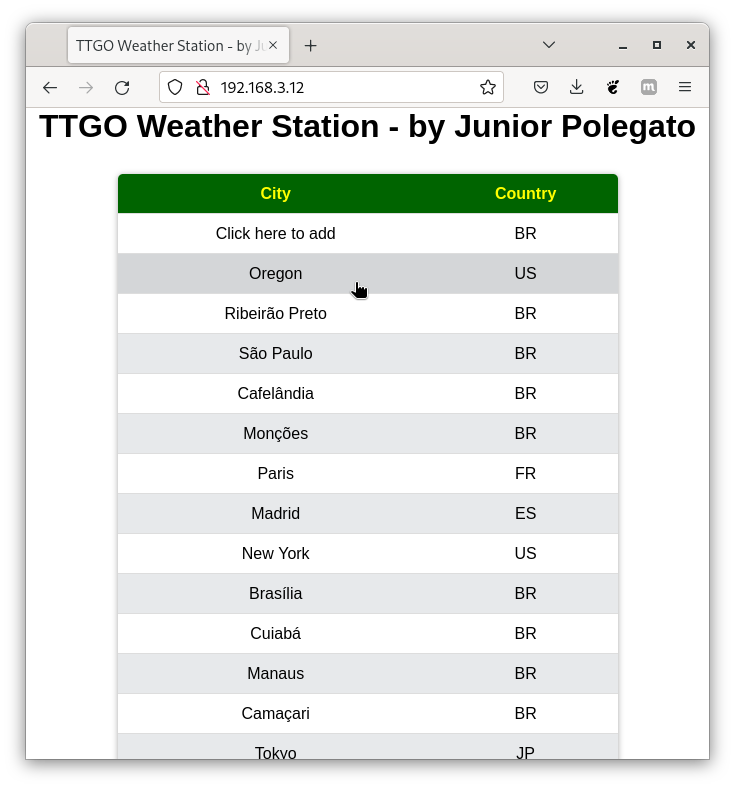
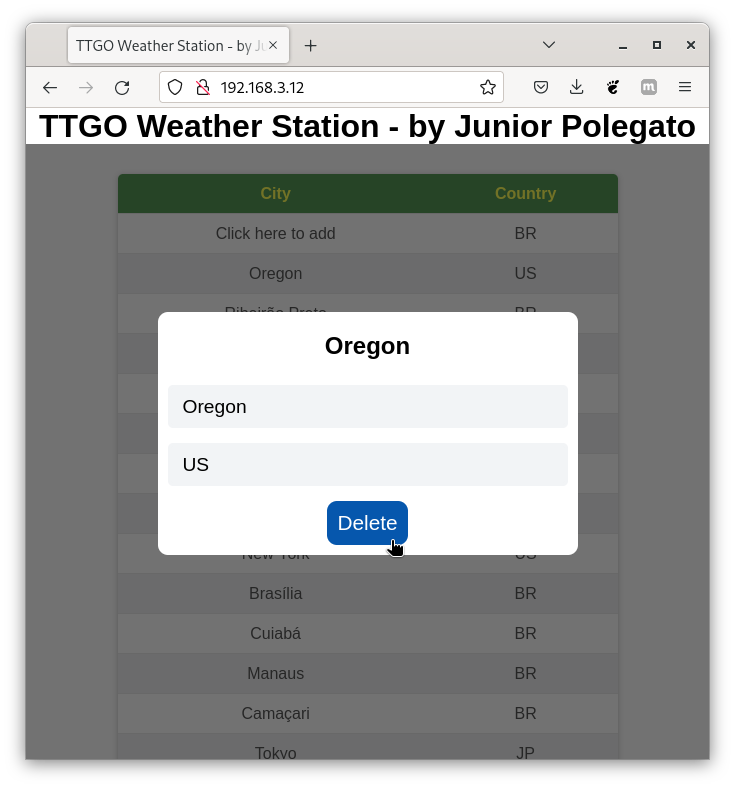
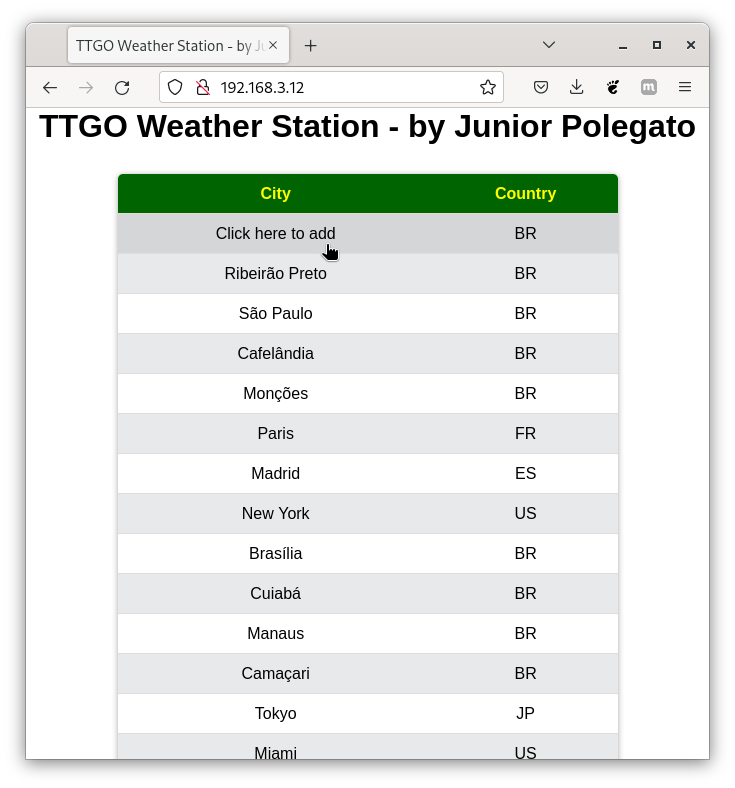
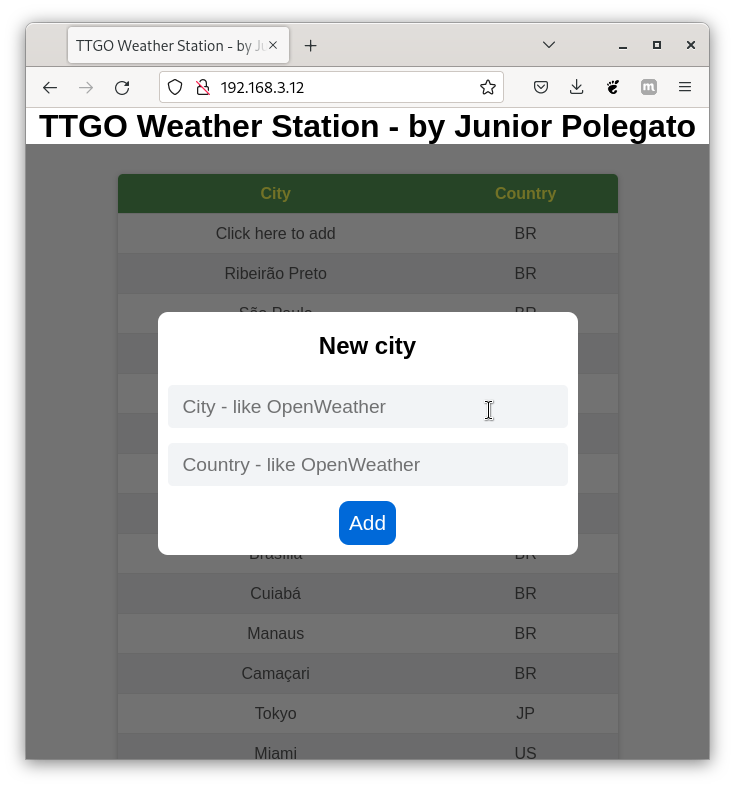
- Now you can select many WiFi networks via web browser, and the cities too. I integrated the project ESPUserConnection of my own into this project. At first boot, you need to connect to ESP AP, access via web browser http://<esp_ap_ip>/wifi, upload files requested, them you can select your WiFi, enter password and your personal Open Weather key, reboot, then access http://<esp_wlan_ip> to manager cities, see bellow:
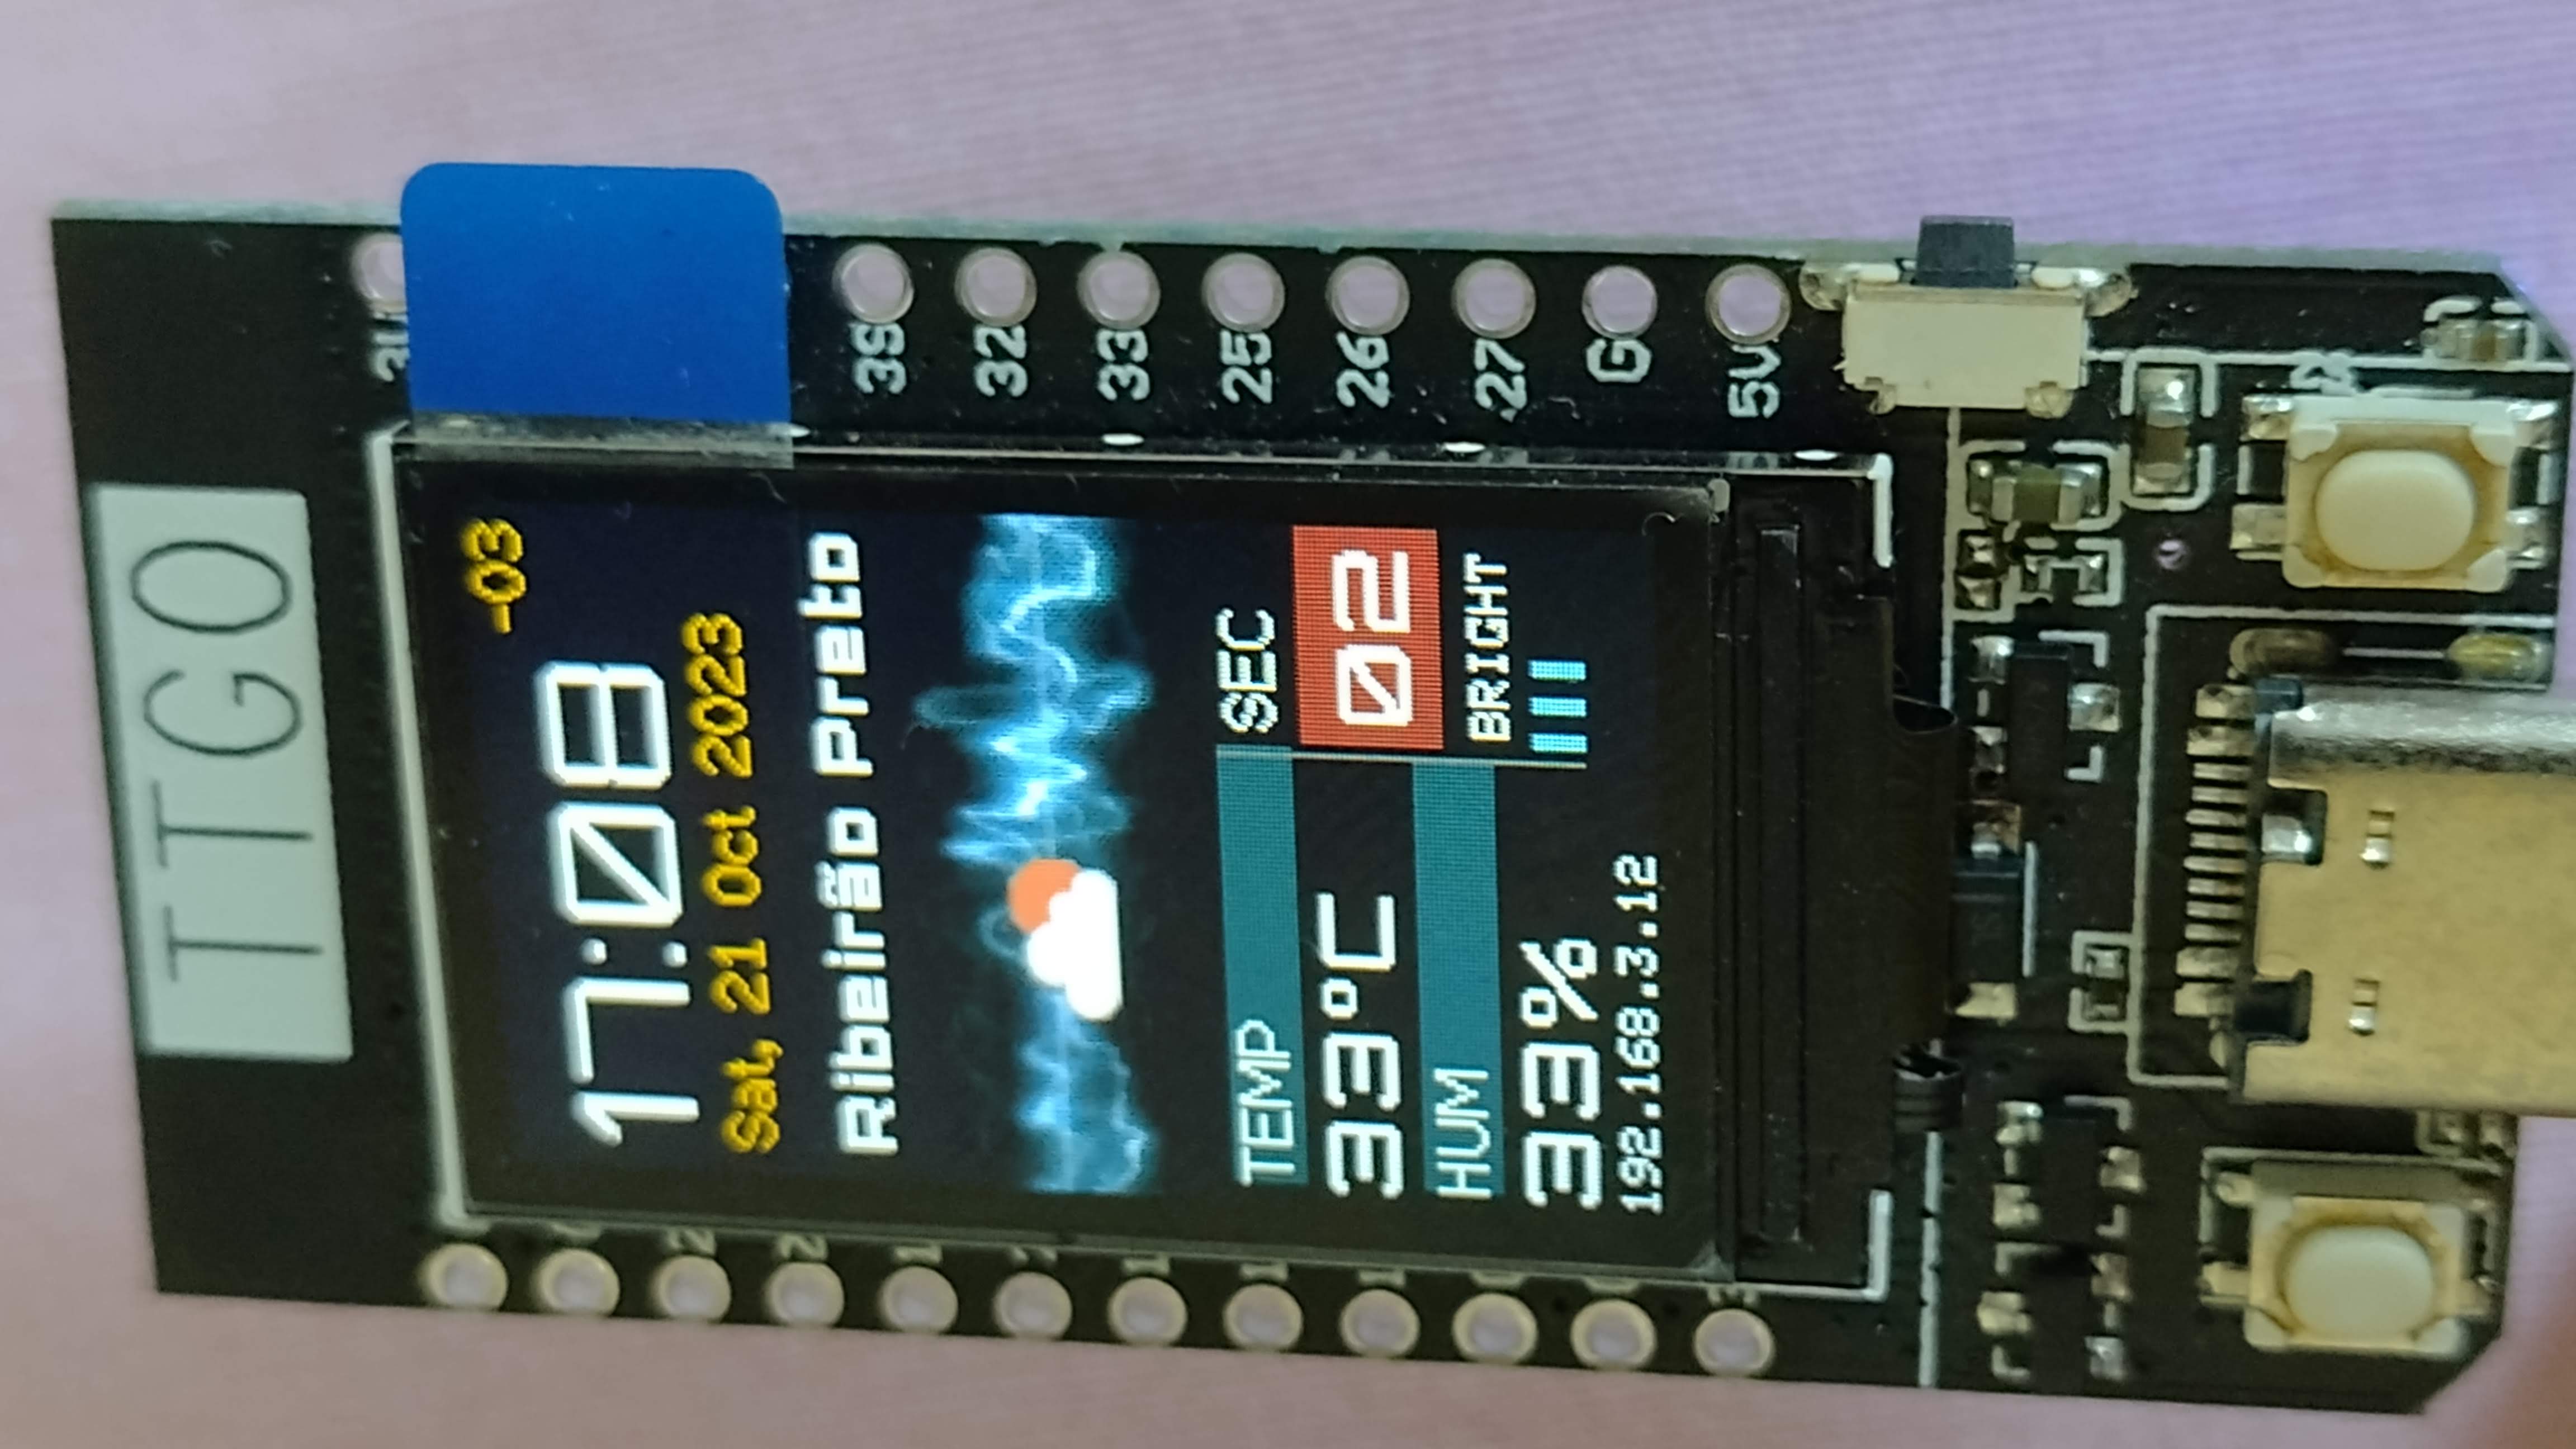
- Show local time with timezone and date
- Show city / town name with nice font and size adjust
- You can put a list of towns in code and swap its by button 1 (left)
- Weather icon with animation
- Temperature and Humidity with nice font and big size
- Brightness level control by button 2 (right)
- Wi-Fi IP address, internet IP address, local informations and extra town informations
- Font editor, see Adafruit-GFX-font-editor
- Image converter, see image-to-rgb565
- Connect your WiFi via web browser, see ESPUserConnection
- Manager Cities via web browser, a extension easy to implement from ESPUserConnection
-
Replaced the inverse display function for button 1 by changing over a list of towns
-
Additionally I create a Python script to add bitmap characters into the font file (.h). REPO
-
I added a degree symbol to the font and now the temperature displays °C, so I needed to adjust the layout.
-
I also added some required utf-8 symbols for towns.
-
For towns with large names, like "Ribeirão Preto", I got font size 14, so it's verified if it needs to change font size from 20 to 14.
-
I also created a Python script to download weather icons, render over a background, convert from 32 bits pixels (RGBA) to 16 bits (RGB565), and you can put the output into a "icons.h" file.
-
With the icon code returned from OpenWeather API, the program selects the correct icon from "icons.h" and puts it into a sprite, which floats over the animation background.
-
The program also gets local informations from http://ipinfo.org/ and joins weather informations from https://openweathermap.org/.
-
Now you can see a footer banner, rotating banner, with extra town informations and local informations.
-
Finally, to get the time, I replaced NTP by ESP32 RTC plus “Date” http header, so the program gets the unix time and timezone from the API JSON response and updates RTC with the actual town's local time and date, therefore it's not necessary to access the NTP client many times per second.
-
Aboud IDE, it used VSCodium (VSCode without telemetry/tracking), with vscode-arduino extension, plus vscode-cpptools.
-
Now I added WiFi and Cities management via web browser using ESPUserConnection
Here is the original: TTGOWeatherStation of VolosR.
Here is the font editor: Adafruit-GFX-font-editor of my own.
Here is the image converter: image-to-rgb565 of my own.
Here is the web browser integration: ESPUserConnection of my own.
This software is licensed with GPL Version 3. https://www.gnu.org/licenses/gpl-3.0.html
