This document describes how to setup your development environment, so that it is ready to run, develop and test the Kit WordPress Plugin.
Suggestions are provided for the LAMP/LEMP stack and Git client are for those who prefer the UI over a command line and/or are less familiar with WordPress, PHP, MySQL and Git - but you're free to use your preferred software.
Any Apache/nginx, PHP 7.x+ and MySQL 5.8+ stack running WordPress. For example, but not limited to:
- Local by Flywheel (recommended)
- MAMP
- WAMP
- VVV
- Docker
If using a non-Docker environment, follow the below steps:
If Composer is not installed on your local environment, enter the following commands at the command line to install it:
php -r "copy('https://getcomposer.org/installer', 'composer-setup.php');"
php -r "if (hash_file('sha384', 'composer-setup.php') === '906a84df04cea2aa72f40b5f787e49f22d4c2f19492ac310e8cba5b96ac8b64115ac402c8cd292b8a03482574915d1a8') { echo 'Installer verified'; } else { echo 'Installer corrupt'; unlink('composer-setup.php'); } echo PHP_EOL;"
php composer-setup.php
php -r "unlink('composer-setup.php');"
sudo mv composer.phar /usr/local/bin/composer
Confirm that installation was successful by entering the composer command at the command line
Using your preferred Git client or command line, clone this repository into the wp-content/plugins/ folder of your local WordPress installation.
If you prefer to clone the repository elsewhere, and them symlink it to your local WordPress installation, that will work as well.
If you're new to this, use GitHub Desktop or Tower
The Kit Plugin (and/or its Addons) provides integrations with the following, and therefore it's recommended to install and activate these Plugins on your local development environment:
- Contact Form 7 (Free)
- Gravity Forms (Paid)
- WishList Member (Paid)
- WooCommerce (Free)
For Kit employees or contractors, licensed versions of paid Third Party Plugins can be made available to you on request.
Create a blank test database in MySQL, with a MySQL user who can read and write to it.
Copy the .env.example file to .env.testing in the root of this repository, changing folder and database credentials as necessary.
Create a codeception.yml file in the root of the repository, with the following contents:
params:
    - .env.testing
This tells Codeception to read the above .env.testing file when testing on the local development enviornment.
In the Plugin's directory, at the command line, run composer install.
This will install two types of packages:
- Packages used by the Plugin (i.e. shared libraries used across multiple Kit Plugins)
- Packages used in the process of development (i.e. testing, coding standards): -- wp-browser -- Codeception -- PHPStan -- PHPUnit -- PHP_CodeSniffer
How to use these is covered later on, and in the Testing Guide
In the root of your WordPress installation, find the wp-config.php file.
Change the following line from (your database name itself may vary):
define( 'DB_NAME', 'local' );to:
if( isset( $_SERVER['HTTP_X_TEST_REQUEST'] ) && $_SERVER['HTTP_X_TEST_REQUEST'] ) {
    // WPBrowser request, performed when Codeception tests are run. Connect to test DB.
    define( 'DB_NAME', 'test' );
} elseif( isset( $_SERVER['HTTP_USER_AGENT'] ) && strpos( $_SERVER['HTTP_USER_AGENT'], 'HeadlessChrome' ) !== false ) {
    // WPWebDriver request, performed when Codeception tests are run. Connect to test DB.
    define( 'DB_NAME', 'test' );
} else {
    // Connect to local DB.
    define( 'DB_NAME', 'local' );
}
When Codeception tests are run, they will include either:
- The
HTTP_X_TEST_REQUESTheader for tests run using WPBrowser. - The
HeadlessChromeHTTP User Agent for tests run using WPWebDriver.
Our change above tells WordPress to use the test database for our test requests, whilst using the local/default database for any other requests.
ChromeDriver is a headless (i.e. non-GUI) browser that our test suite uses to run End to End tests, interacting with the Kit Plugin just as a user would - including full JavaScript execution, user inputs etc.
Download ChromeDriver for your Google Chrome version and OS from https://sites.google.com/chromium.org/driver/downloads?authuser=0
For Mac users, copy the unzipped executable to /usr/local/bin.
First, run the ChromeDriver in a separate Terminal window:
chromedriver --url-base=/wd/hub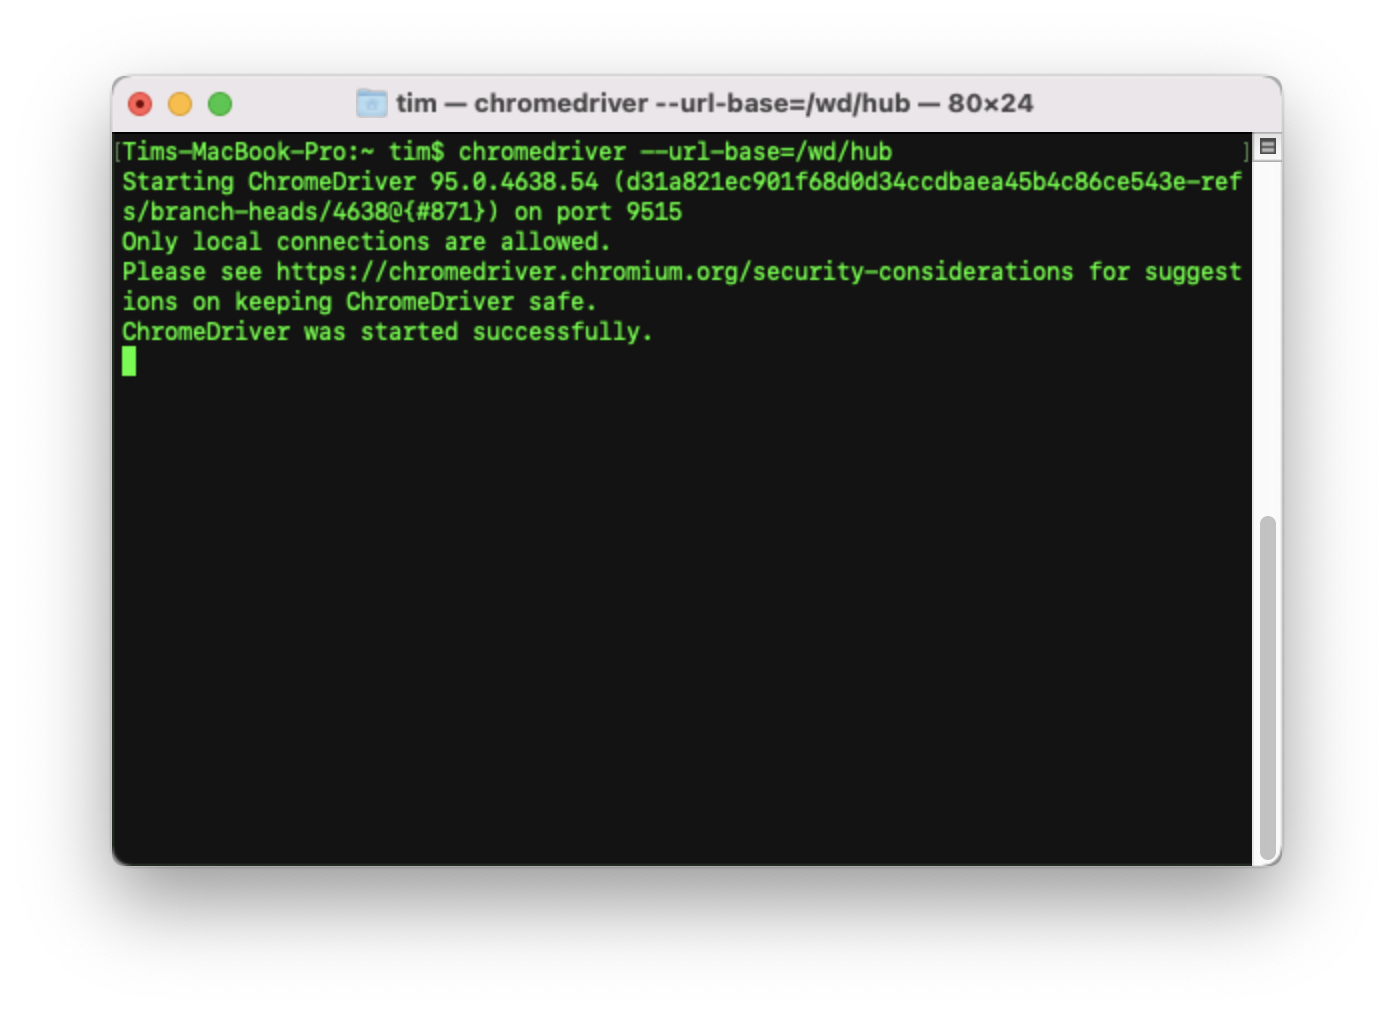
In a second Terminal window, in the Plugin's directory, build and run the tests to make sure there are no errors and that you have correctly setup your environment:
vendor/bin/codecept build
vendor/bin/codecept run EndToEnd
vendor/bin/codecept run Integration
Don't worry if you don't understand these commands; if your output looks similar to the above screenshot, and no test is prefixed with E,
your environment is setup successfully.
In the Plugin's directory, run the following command to run PHP_CodeSniffer, which will check the code meets WordPress' Coding Standards:
vendor/bin/phpcs ./ -v -s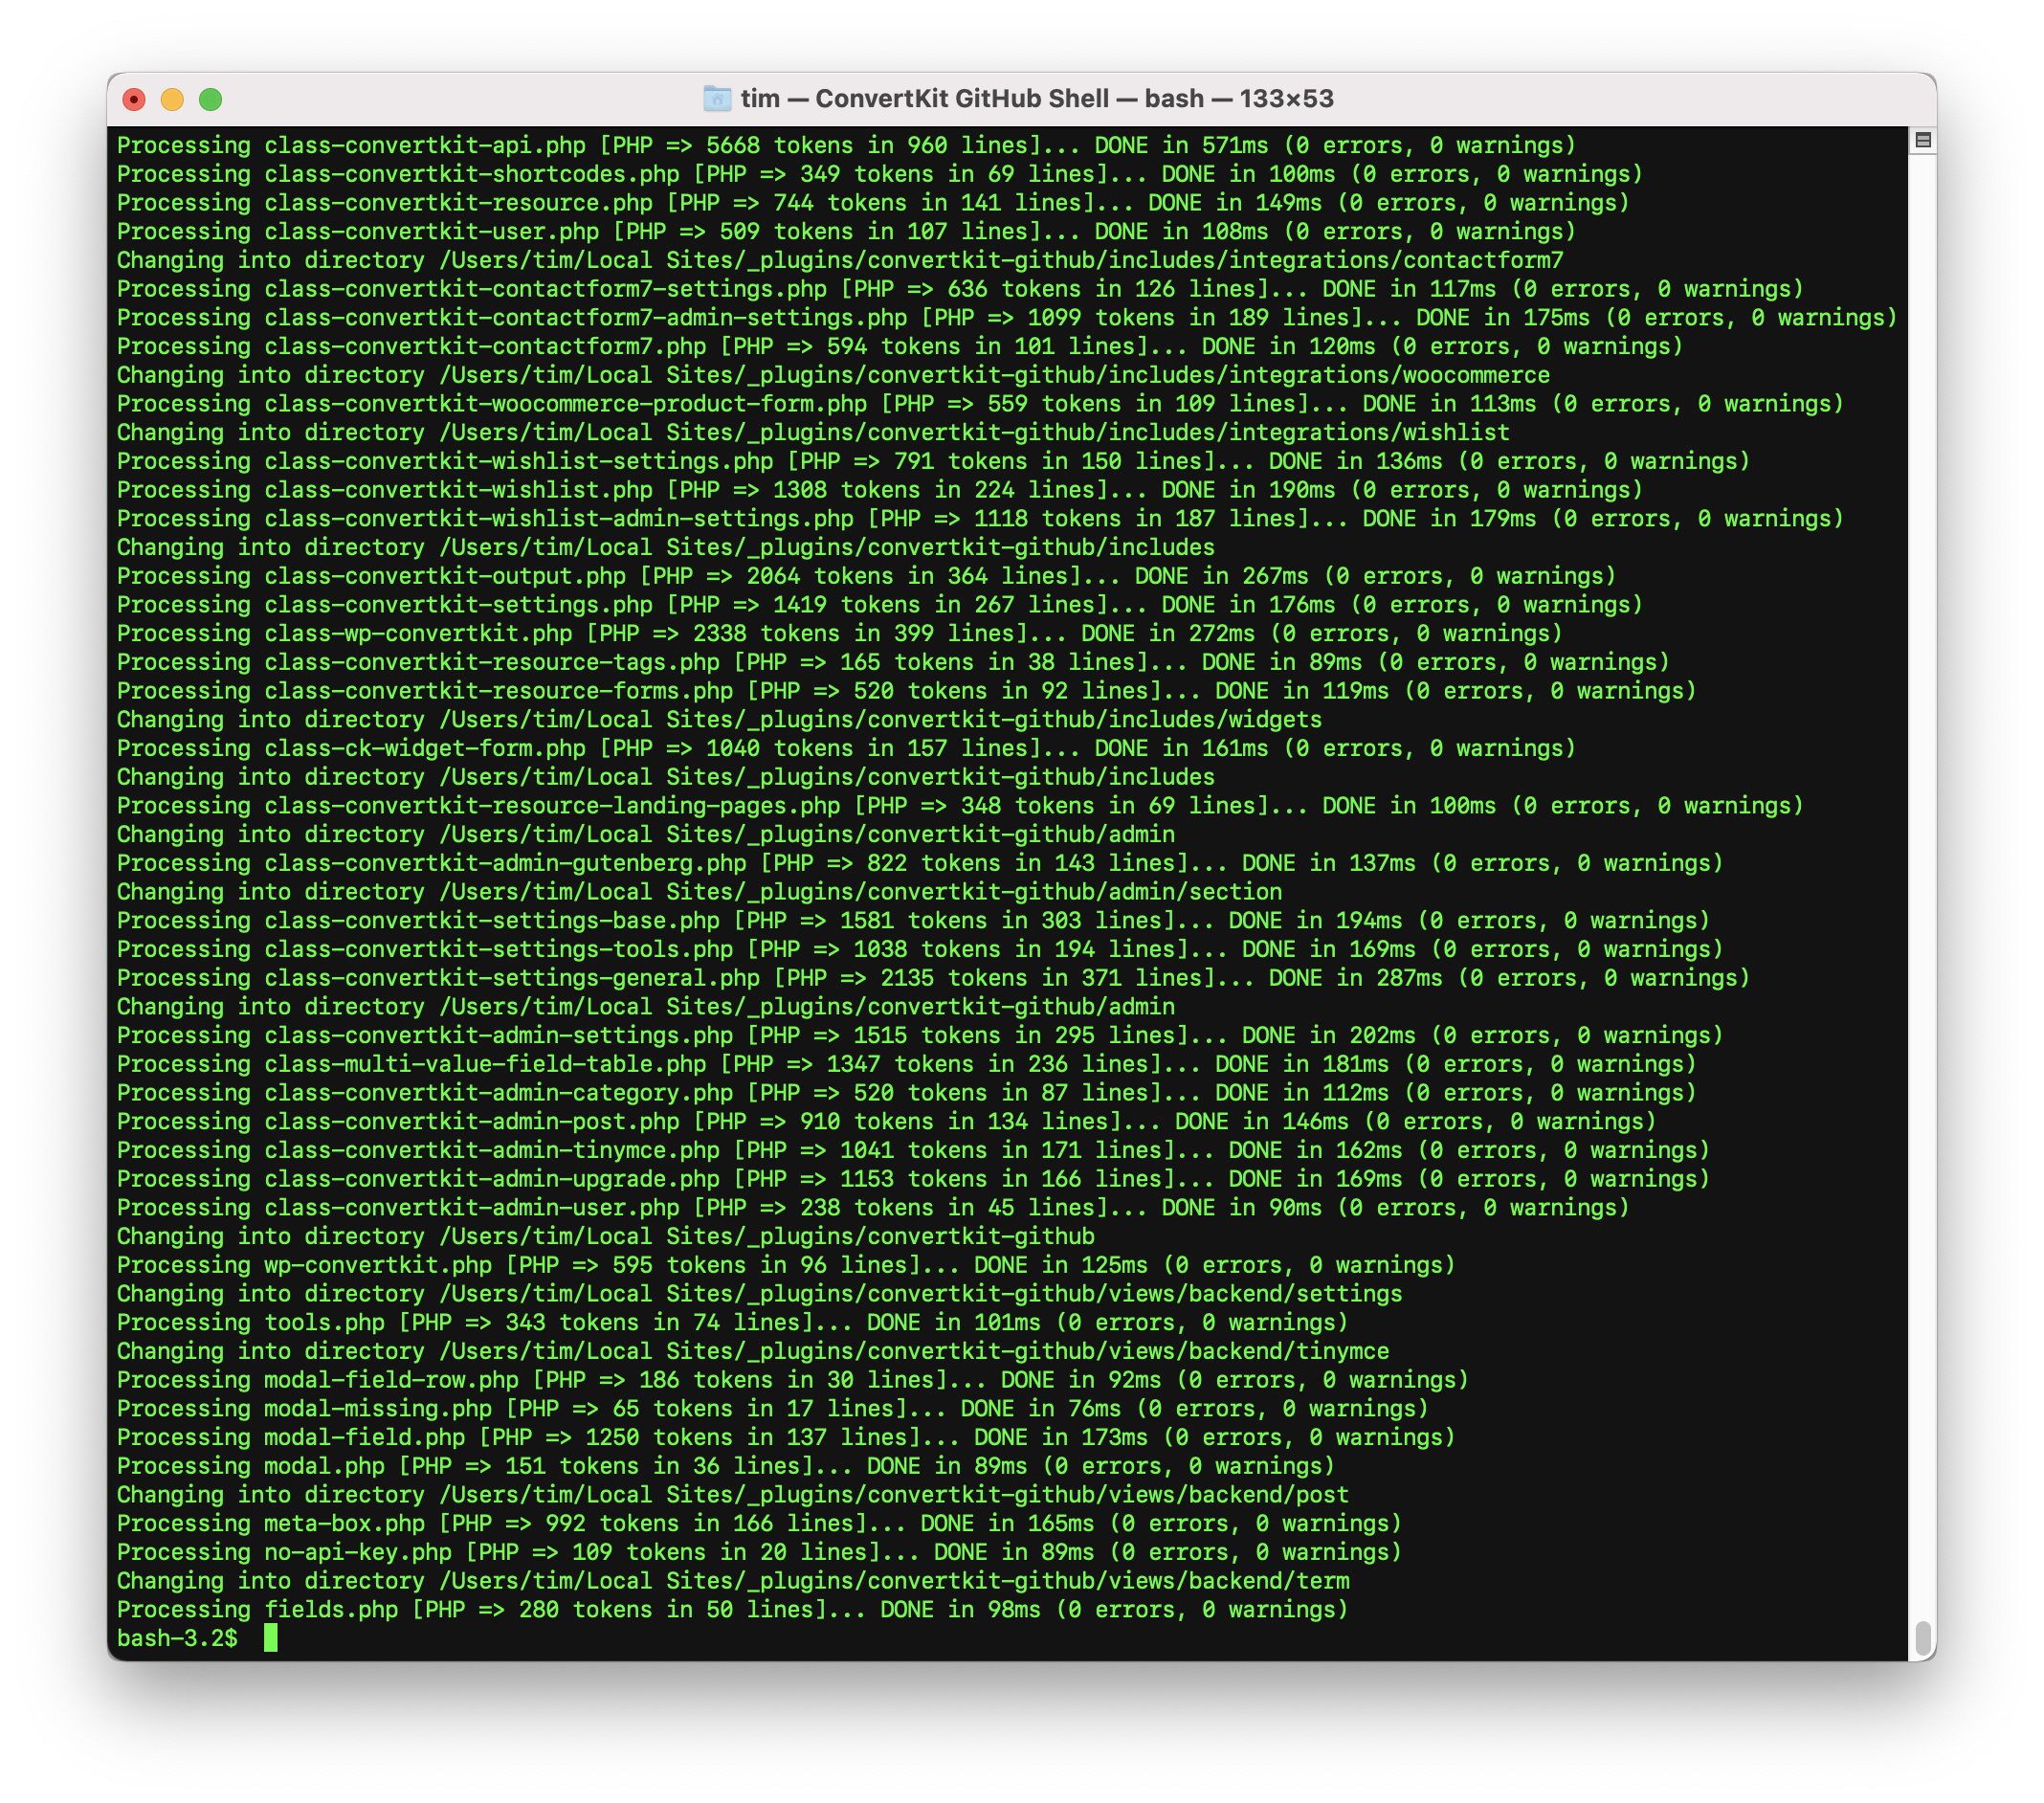
Again, don't worry if you don't understand these commands; if your output looks similar to the above screenshot, with no errors, your environment is setup successfully.
In the Plugin's directory, run the following command to run PHPStan, which will perform static analysis on the code, checking it meets required standards, that PHP DocBlocks are valid, WordPress action/filter DocBlocks are valid etc:
vendor/bin/phpstan --memory-limit=1G
Again, don't worry if you don't understand these commands; if your output looks similar to the above screenshot, with no errors, your environment is setup successfully.
Refer to the Kit Help Article to get started with using the WordPress Plugin.
Using the Development Container, and either GitHub Codespaces or VS Code, it's quick and easy to get started:
Using your preferred Git client or command line, clone this repository to your local machine.
If you're new to this, use GitHub Desktop or Tower
- Install Docker Desktop, or Docker Engine if you're developing on Linux
- Install Visual Studio Code
- Open Visual Studio Code, and install the Dev Containers extension
- Open the Visual Studio Code Command Palette (
Ctrl + Shift + P) - Type
>Dev Container: Rebuild and Reopen in Container, pressing Enter
Visual Studio Code will switch to the Dev Container, loading the preconfigured Docker image for WordPress development, with the Terminal in Visual Studio Code showing the progress:
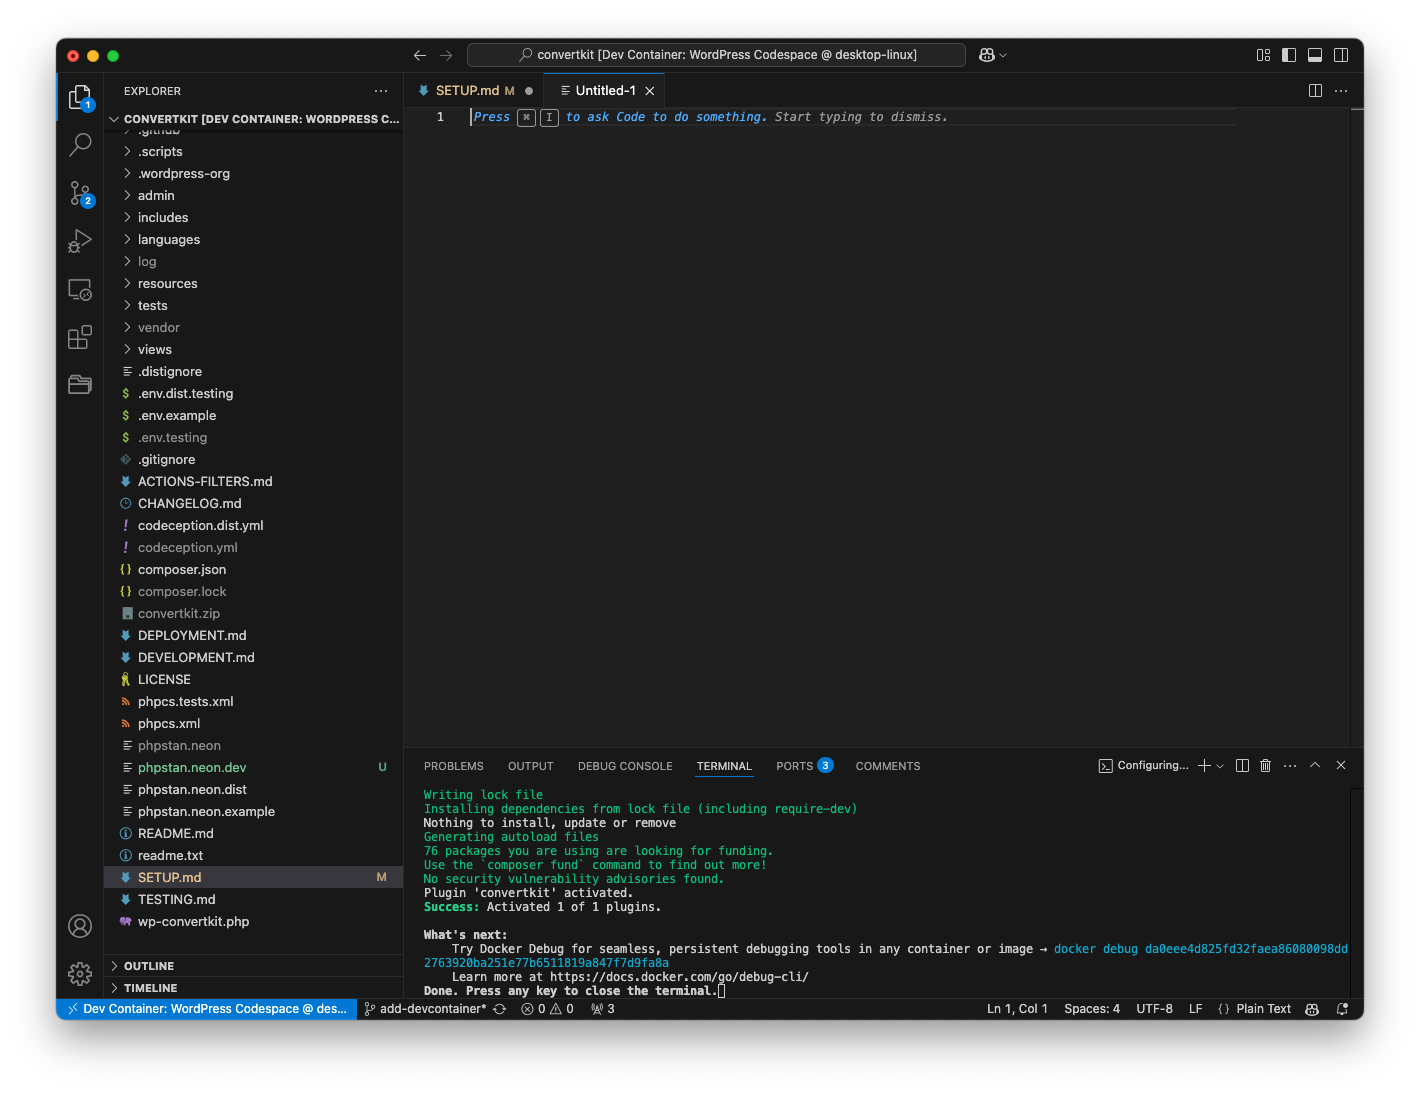
After a few minutes, your development environment should be ready.
Click on the Ports tab, and navigate to the "Application" URL by hovering over the Forwarded Address and clicking the globe icon:

To access the WordPress Administration interface, append /wp-admin to the URL, using the following credentials:
- Username:
vipgo - Password:
password
Once logged in, navigating to the Plugins screen will show the repository Plugin installed and active, along with some other common third party Plugins:

In Visual Studio Code's Terminal, navigate to /workspaces/convertkit-wordpress, and run the following command to run PHP_CodeSniffer, which will check the code meets WordPress' Coding Standards:
vendor/bin/phpcs ./ -v -sIf no Terminal instance is open, you can create a new one by clicking the + icon.

In Visual Studio Code's Terminal, navigate to /workspaces/convertkit-wordpress, and run the following command to run PHPStan, which will perform static analysis on the code, checking it meets required
standards, that PHP DocBlocks are valid, WordPress action/filter DocBlocks are valid etc:
vendor/bin/phpstan --configuration phpstan-dev.neon --memory-limit=1GIf no Terminal instance is open, you can create a new one by clicking the + icon.
Codeception testing is currently unavailable when using Dev Containers or GitHub Codespaces. This may be available in a future PR.
With your development environment setup, you'll probably want to start development, which is covered in the Development Guide