Set up your own DOM Cloud server instance inside a virtualized platform and control it with our cloud platform.
Our self hosted solution is for our customers who:
- Behind a corporate that mandates all data is self hosted to an on-premise server
- Wishing for more computing power or having the hardware their your control
With Caveats:
- This approach is generally more complex than simply using our cloud servers
- Requires good knowledge of Linux and its networking components to make everything works
- You're resposible to everything a server needs to do, including keeping the software up to date
Here's feature comparison:
| Compare Features | Cloud | Self-Hosted |
|---|---|---|
| Getting Started | Easy | Easy but Challenging |
| Who own the Infra? | Us | You |
| Who monitor Infra? | Us | You |
| Has Public IP | ✅ | Depends on your ISP |
Use nsp/nss.domcloud.co NS |
✅ | ❌ |
Can use domcloud.dev |
✅ | If not behind NAT |
| Storage/Network Limit | Calculated | Unlimited |
Can have root Access |
❌ | ✅ |
| Self-hosted email | ❌ | Possible but discouraged |
The most recent one built on 2024-12-06:
- domcloud-rocky-x86_64.qcow2 4.5 GB
- domcloud-rocky-x86_64.vmdk 2.6 GB
- domcloud-rocky-aarch64.qcow2 4.3 GB
- domcloud-rocky-aarch64.vmdk 2.5 GB
- checksum
Select based on Virtualization platform e.g. Proxmox and QEMU uses QCOW2 while VMWare and VirtualBox uses VMDK.
If you don't want to download our custom prebuilt images, you can run these from freshly installed Rocky Linux Minimal ISO or Ubuntu Server ISO instead:
# make sure to run this using root:
if [ -f /etc/lsb-release ]; then OS=ubuntu; elif [ -f /etc/redhat-release ]; then OS=rocky; else OS=unknown; fi
curl -sSL https://github.com/domcloud/container/raw/refs/heads/master/install-$OS.sh | bash
curl -sSL https://github.com/domcloud/container/raw/refs/heads/master/preset.sh | bashWe use Hashicorp Packer to build images. We ran it inside privilenged docker. Simply run make build-image. With KVM acceleration the build should be done around one hour.
The image consist of Rocky Linux Minimal ISO + Some scripts that installs Virtualmin and additional services to make it exactly like how a DOM Cloud server works. See install.sh and preset.sh to see the install scripts.
To run the final image using QEMU:
qemu-system-x86_64 -hda domcloud-x86_64.qcow2 -smp 2 -m 2048 -net nic -net user,hostfwd=tcp::2022-:22,hostfwd=tcp::2080-:80,hostfwd=tcp::3443-:443,hostfwd=tcp::2443-:2443 -cpu max -accel kvm
# Windows: -cpu Broadwell -accel whpx,kernel-irqchip=off
This VM expose these ports:
- 22 for SSH
- 53 for DNS
- 80 and 443 for HTTP/HTTPS
- 2443 for Webmin
There's http://localhost Handled by NGINX to that runs our bridge software. This software orchestrates your VM based on (To be undocumented) REST APIs.
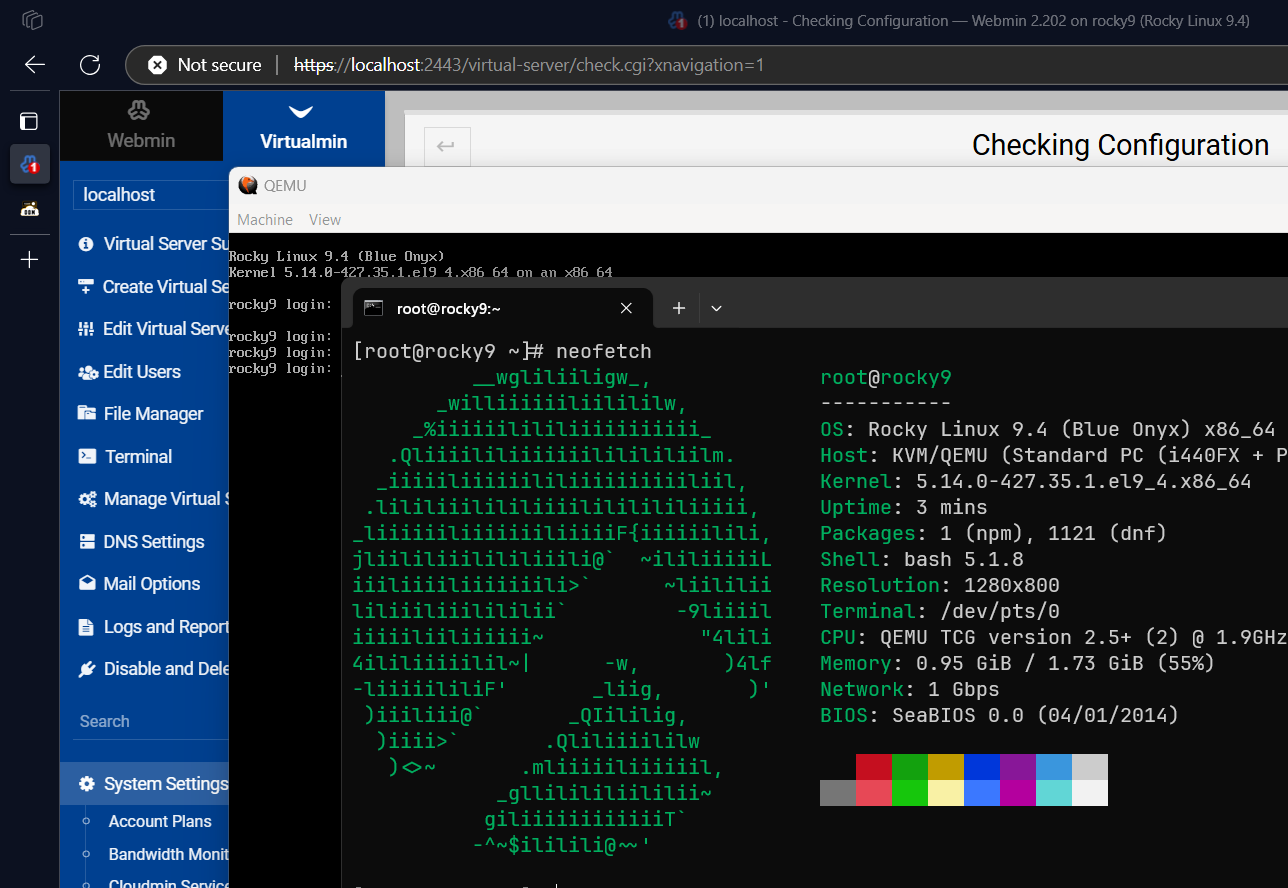
Go to https://localhost:2443 in your browser to open webmin. Additionally, go to http://localhost/status/check and http://localhost/status/test To see if all services running and configured correctly.
Enter credential root with rocky as password for SSH and Webmin login.
The root password includes the root webmin access is rocky. The bridge HTTP secret and webmin login is also set to rocky.
Please assign your 80 and 443 to your static public IP address.
If you don't have a public IP address or you're just running the whole VM behind NAT or your personal laptop, please have a domain and install Cloudfare Zero Trust HTTP Tunnel to port 80 inside the VM.
You have 5 passwords to change. To change it, run this script:
# make sure to run this using root:
curl -sSL https://github.com/domcloud/container/raw/refs/heads/master/genpass.sh | bashGo to https://localhost:2443 and log in with user root.
- Finish the post installation wizard
- Go to
Virtualmin->System Settings->Re-Check Configuration
The VM is built with QEMU. The networking IP addresses definitely changed and you need to adjust it.
- Identify your IP addresses, run
nmcli dev show ens3orip addr show scope globalin terminal. - Go to
Virtualmin->Addresses and Networking->Change IP Addresses - Enter old IP
10.0.2.15and new IP. ClickChange Now. - Also Update DNS default IP address by go to
Virtualmin Configuration->Networking Settings-> Default IP Address for DNS records.
The bridge default domain name is defaulted to localhost so you can open it via your laptop. But to connect it to DOM Cloud, you must put it to a domain. You can run this in SSH:
virtualmin change-domain --username bridge --new-domain mysystemdomain.comMake sure to insert A or AAAA record to that domain.
First, change your system hostname to the domain
sudo hostnamectl set-hostname "mysystemdomain.com"Then go to Manage Virtual Server > Setup SSL Certificate > SSL Providers and click "Request Certificate"
Run yum update.
The disk is prebuilt with capped at 40 GB. Here's how it layouted.
# lsblk
NAME               MAJ:MIN RM  SIZE RO TYPE MOUNTPOINTS
sr0                 11:0    1 1024M  0 rom
vda                252:0    0  256G  0 disk
├─vda1             252:1    0    1G  0 part /boot
└─vda2             252:2    0   39G  0 part
  ├─rl_rocky9-root 253:0    0 36.9G  0 lvm  /
  └─rl_rocky9-swap 253:1    0    2G  0 lvm  [SWAP]
The vda is the real disk provisioned by the system. To extend the vda2:
- Open
parted /dev/vdaresizepart- Select 2
vda2 - Enter the new size
100%
partprobepvresize /dev/vda2- Resize swap
- Turn off the swap
swapoff /dev/mapper/rl_rocky9-swap - Extend it (say 8GB)
lvresize -L 8G /dev/rl_rocky9/swap mkswap /dev/rl_rocky9/swapswapon /dev/rl_rocky9/swap
- Turn off the swap
- Resize main disk
lvresize -l +100%FREE /dev/rl_rocky9/rootxfs_growfs /
Goto Servers section in DOM Cloud Portal Dashboard to connect to our cloud portal.
Why still connecting to our cloud portal?
- Bridge is
headless. There are no UI, just pure APIs. The APIs are used to communicate to your instance. - All tools works out of the box, including Deployment systems, templates and GitHub integration
- Deployments for self-hosted instances doesn't use storage/data network/instance limit
- You get some cloud features like backups, domcloud.dev domain, team collab, etc
- Can be connected for free