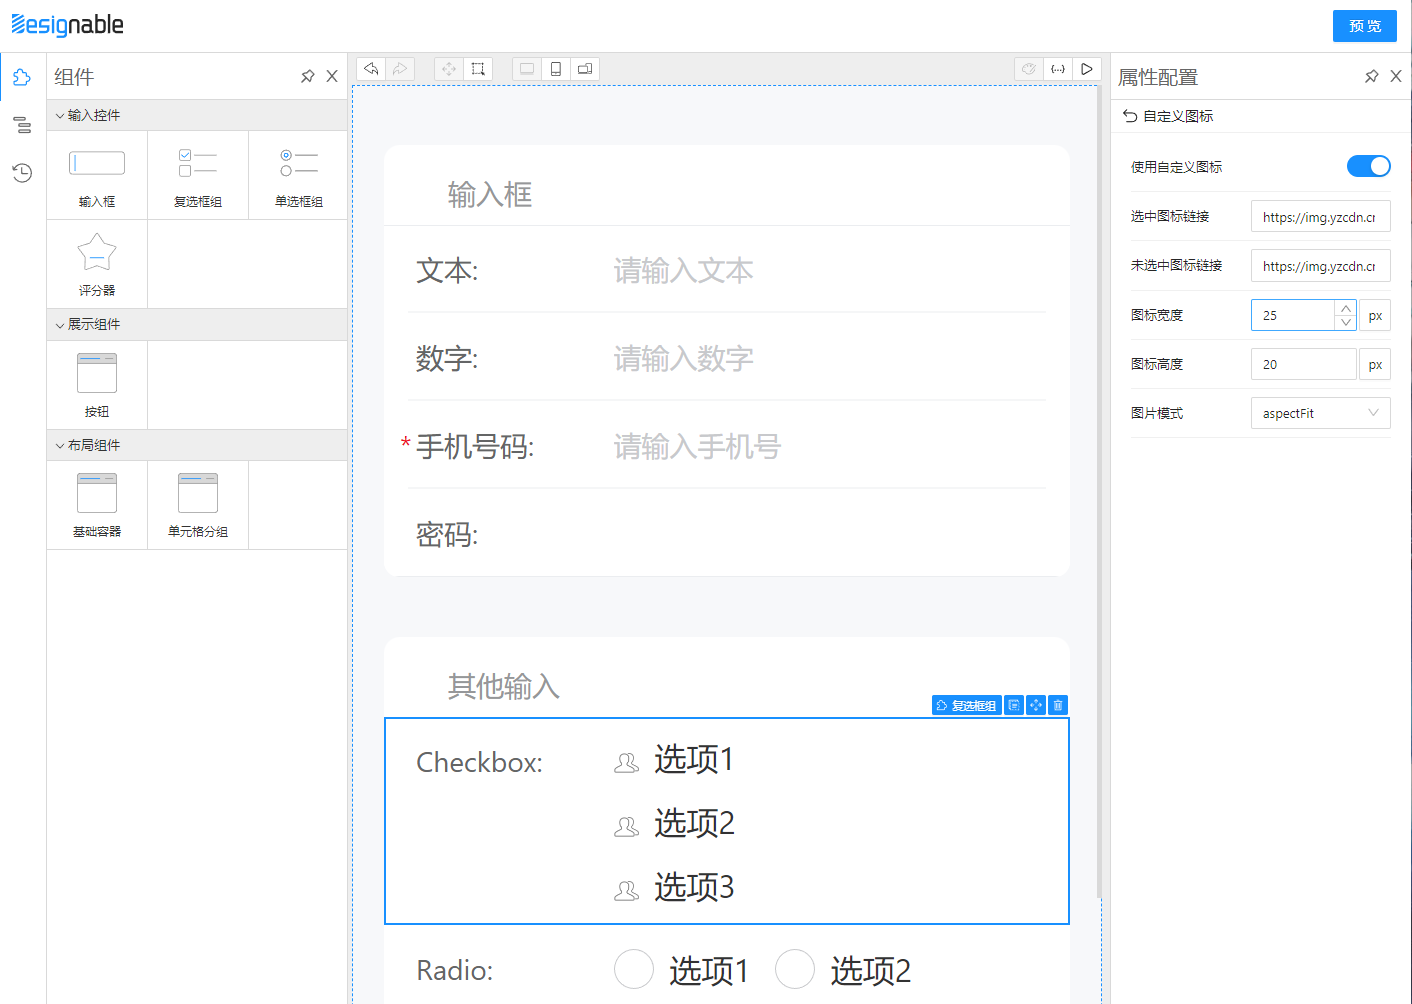
上一篇文章已经有了基本的组件库、协议和渲染器,并且在设计器中可以配置组件属性最终渲染界面,这篇文章介绍如何让 小程序 和 H5 渲染设计器产出的JSONSchema。
可视化设计器(体积很大,注意流量,最好用PC打开) https://miku01.cn/taroifyDesignable/index.html
demo H5(按 F12 切换设备仿真) https://miku01.cn/taroifyDemo/index.html#/pages/index/index

我们开发好的组件库就是基于Taro组件标签写的,所以在Taro项目编译到H5或小程序就能在想要的平台中展示设计好的页面中。
要渲染 可视化搭建设计器 产出 JSONSchema,需要使用 @formily/core + @formily/react 以及组件库中的 SchemaField
但是要用在小程序端最主要有两个问题 1.在PC设计器上,设置组件样式的单位是px,需要转换为rem
这个问题主要是使用 Taro.pxTransform 将以px为单位的数字转为 以rem为单位的字符串,配合正则就可以实现对某段style进行转换
const pxToRem = (str) => {
    const reg = /(\d+(\.\d*)?)+(px)/gi;
    return String(str).replace(reg, function (x) {
        const val = x.replace(/px/gi, '');
        return Taro.pxTransform(Number(val));
    });
};
对JSONSchema进行递归转换单位就解决了这个问题
2.formily Schema 联动协议需要动态执行JS代码,但小程序不能使用 Function/eval,需要一个JS写的JS解释器
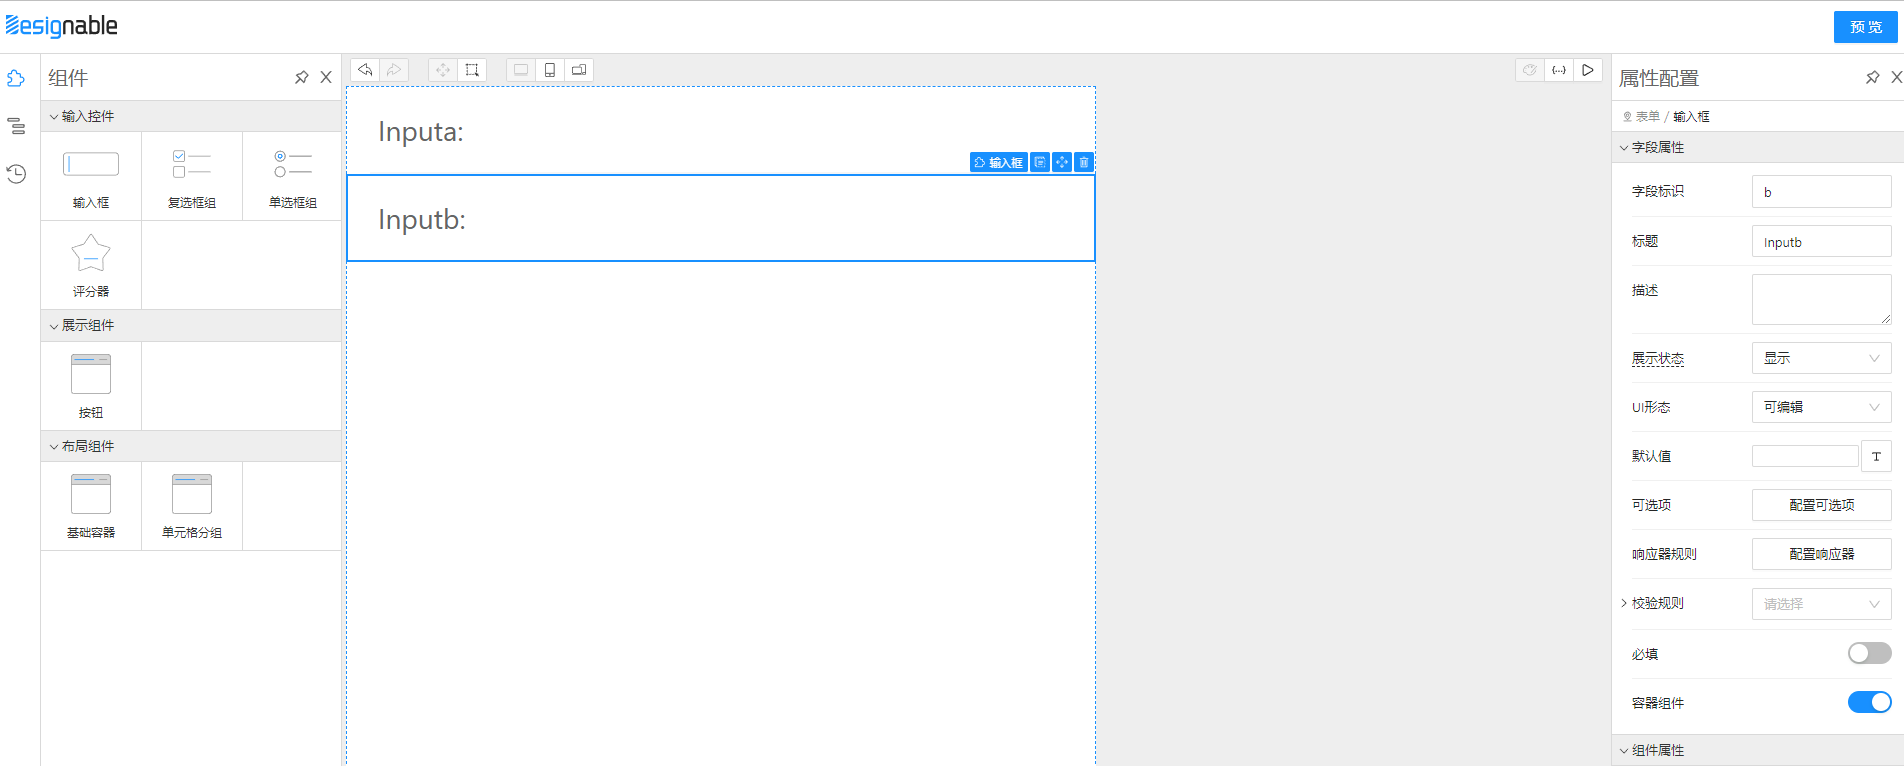
举一个上篇文章中的例子,表单中有字段为a的输入框和字段为b的输入框,单a的值为 'hidden' 时把b隐藏掉
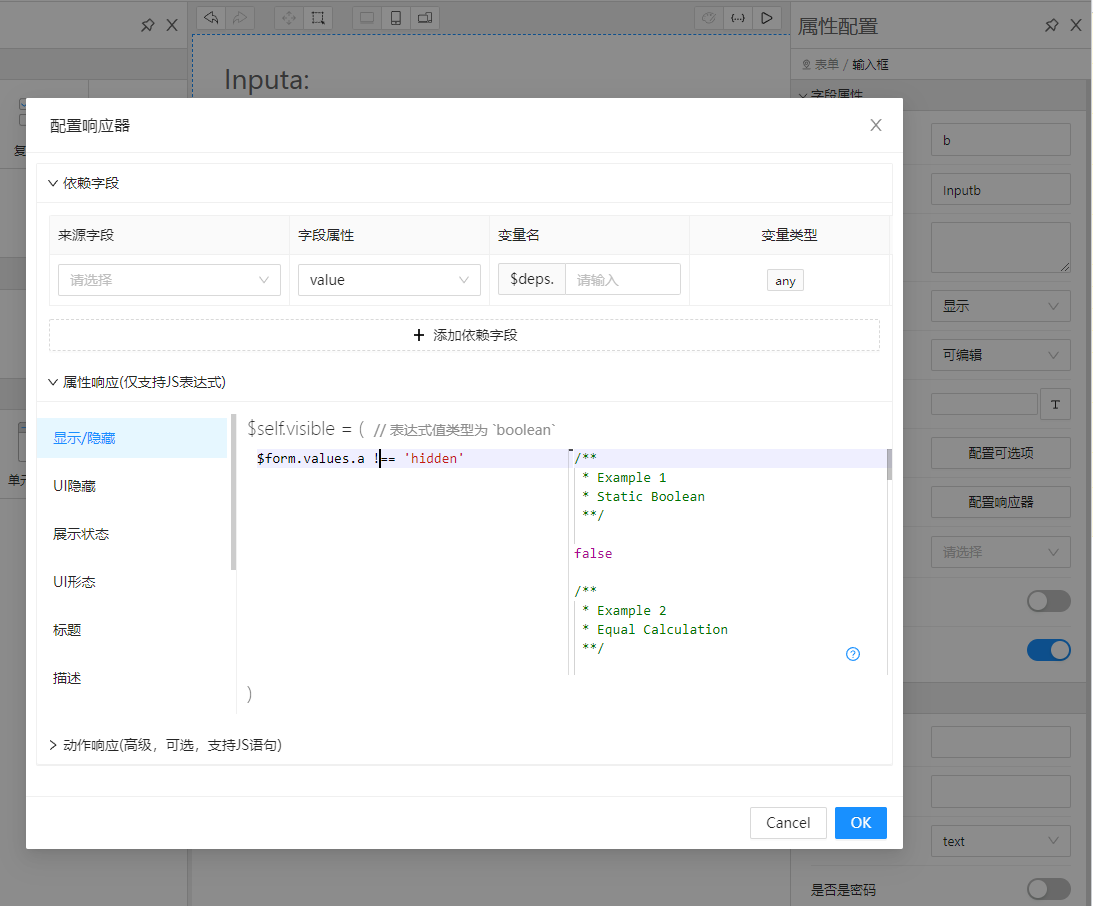
那么这里需要动态执行的代码(表达式)是
$form.values.a !== 'hidden'在 @formily/json-schema 中源码是使用 new Function 去执行的,把动态代码置于 formily作用域 运行以获得访问表单数据的能力
var Registry = {
    silent: false,
    compile: function (expression, scope) {
        if (scope === void 0) { scope = {}; }
        if (Registry.silent) {
            try {
                return new Function('$root', "with($root) { return (".concat(expression, "); }"))(scope);
            }
            catch (_a) { }
        }
        else {
            return new Function('$root', "with($root) { return (".concat(expression, "); }"))(scope);
        }
    },
};
@formily/json-schema 中导出的 Schema 里面 registerCompiler 的方法允许使用者注册自己的逻辑,这里我们改成用JS写的JS解释器去运行动态代码
function formilyCompilerInMiniRegister() {
    // json-schema注册兼容小程序的解析器
    Schema.registerCompiler(function (expression, scope) {
        if (scope === void 0) {
            scope = {};
        }
        const scopeKey = [
            '$dependencies',
            '$deps',
            '$effect',
            '$form',
            '$memo',
            '$observable',
            '$props',
            '$self',
            '$target',
            '$values',
        ];
        scopeKey.forEach((key) => {
            const reg = new RegExp(`\\${key}`, 'g');
            expression = expression.replace(reg, 'scope.' + key);
        });
        const bridge = { current: null };
        const context = vm.createContext({ bridge, expression, scope, console });
        try {
            vm.runInContext(`a.current = ${expression} `, context);
        }
        catch (err) {
            console.error(err);
        }
        return bridge.current;
    });
}这篇文章后面没啥干货了,只是简单介绍如何使用我的低代码组件库
1.首先全局安装 @tarojs/cli, 注意一定要3.5.0-beta.6以上版本(现在3.5.0已经正式发布)
npm i -g @tarojs/[email protected]2.找一个合适的目录初始化一个Taro项目,选择 React、TypeScript、Sass、Webpack5 和内置模板
taro init3.进入到项目中 安装formily系列依赖和taroify组件库依赖
yarn add @formily/core @formily/react @taroify/core4.安装低代码组件库
这里安装了一个JS写的JS解释器,原因为了在小程序内部禁用了eval、Function的情况下依然要执行动态脚本。原仓库是axetroy/vm,但是npm上没有发布编译后的结果,所以我fork并发了个包。它的作用跟eval5类似
yarn add @kimeng/vm taroify-formily5.app.ts 引入组件库样式
import { Component } from 'react'

import '@taroify/icons/index.scss' // taroify图标样式
import '@taroify/core/index.scss' // taroify组件样式
import 'taroify-formily/dist/index.scss' // 可视化搭建组件库样式
import './app.scss'

class App extends Component {
  componentDidMount() {}

  componentDidShow() {}

  componentDidHide() {}

  componentDidCatchError() {}

  // this.props.children 是将要会渲染的页面
  render() {
    return this.props.children
  }
}

export default App
6.pages/index/index.tsx
这里是怎样渲染JSONSchema的关键
- 用
@formily/core导出的createForm创建form实例 - 用物料组件库中的
Form组件(实际上用了@formily/react导出的FormProvider)桥接form实例与UI - 用物料组件库中的
SchemaField组件(实际上用了@formily/react导出的createSchemaField)去渲染JOSNSchema,JOSNSchema使用前先处理一遍style单位
import React, { useEffect, useMemo, useState } from 'react'
import { createForm } from '@formily/core'
import { FormProvider } from '@formily/react'
import { Button, View } from '@tarojs/components'
import Taro from '@tarojs/taro'
import {
  Form,
  formStyleTransitionPx,
  SchemaField,
  schemaTransitionPx,
} from 'taroify-formily/lib'

import './index.scss'

const testJson = {
  "form": {},
  "schema": {
    "type": "object",
    "properties": {
      "xrcahr24sd1": {
        "type": "void",
        "x-component": "WidgetCellGroup",
        "x-component-props": {
          "style": {
            "width": "750px",
            "height": "inherit",
            "position": "relative"
          },
          "event": {
            "click": {},
            "close": {}
          }
        },
        "x-designable-id": "xrcahr24sd1",
        "properties": {
          "a": {
            "type": "string",
            "title": "a",
            "x-decorator": "FormItem",
            "x-component": "Input",
            "x-validator": [],
            "x-component-props": {
              "style": {
                "position": "relative"
              },
              "event": {}
            },
            "x-decorator-props": {},
            "name": "a",
            "x-designable-id": "aqxev246ukm",
            "x-index": 0
          },
          "b": {
            "type": "string",
            "title": "b",
            "x-decorator": "FormItem",
            "x-component": "Input",
            "x-validator": [],
            "x-component-props": {
              "style": {
                "position": "relative"
              },
              "event": {}
            },
            "x-decorator-props": {},
            "name": "b",
            "x-reactions": {
              "dependencies": [
                {
                  "property": "value",
                  "type": "any"
                }
              ],
              "fulfill": {
                "state": {
                  "visible": "{{$form.values.a !== 'hidden'}}"
                }
              }
            },
            "x-designable-id": "7eyobxct2p0",
            "x-index": 1
          }
        },
        "x-index": 0
      }
    },
    "x-designable-id": "bn8352ri1ld"
  }
}

function transitionPx(designableJson) {
  schemaTransitionPx(designableJson.schema, { mode: 'rem' })
  formStyleTransitionPx(designableJson.form, { mode: 'rem' })
}

export default () => {
  const [designableJson, setdesignableJson] = useState(testJson)
  const form = useMemo(() => createForm(), [])
  transitionPx(designableJson)

  return (
    <View>
      <Form form={form} {...designableJson.form}>
        <SchemaField schema={designableJson.schema} />
      </Form>
    </View>
  )
}
7.一些打包配置和index.html模板修改
修改config/index.js
const path = require('path')

const config = {
  projectName: 'test',
  date: '2022-7-25',
  designWidth: 750,
  deviceRatio: {
    640: 2.34 / 2,
    750: 1,
    828: 1.81 / 2
  },
  sourceRoot: 'src',
  outputRoot: 'dist',
  plugins: [],
  defineConstants: {
  },
  copy: {
    patterns: [
    ],
    options: {
    }
  },
  framework: 'react',
  compiler: {
    type: 'webpack5',
    prebundle: { // 禁用prebundle 实测打包到h5会报错
      enable: false
    }
  },
  mini: {
    postcss: {
      pxtransform: {
        enable: true,
        config: {

        }
      },
      url: {
        enable: true,
        config: {
          limit: 1024 // 设定转换尺寸上限
        }
      },
      cssModules: {
        enable: false, // 默认为 false,如需使用 css modules 功能,则设为 true
        config: {
          namingPattern: 'module', // 转换模式,取值为 global/module
          generateScopedName: '[name]__[local]___[hash:base64:5]'
        }
      }
    },
    webpackChain(chain) {
      chain.merge({
        optimization: {
          splitChunks: {
            cacheGroups: {
              customGroup: { // 分割依赖
                test(module) {
                  return /@kimeng[\\/]vm/.test(module.resource)
                },
                name: 'vm',
                priority: 100,
              },
            },
          },
        },
      })
    },
    commonChunks: ['runtime', 'vendors', 'taro', 'common', 'vm'],
  },
  h5: {
    staticDirectory: 'static',
    postcss: {
      autoprefixer: {
        enable: true,
        config: {
        }
      },
      cssModules: {
        enable: false, // 默认为 false,如需使用 css modules 功能,则设为 true
        config: {
          namingPattern: 'module', // 转换模式,取值为 global/module
          generateScopedName: '[name]__[local]___[hash:base64:5]'
        }
      }
    },
    esnextModules: ["@taroify"] // taroify 打包到h5需要处理
  },
  alias: {
    '@': path.resolve(__dirname, '..', 'src')
  },
}

module.exports = function (merge) {
  if (process.env.NODE_ENV === 'development') {
    return merge({}, config, require('./dev'))
  }
  return merge({}, config, require('./prod'))
}
修改index.html
<!DOCTYPE html>
<html>
<head>
  <meta content="text/html; charset=utf-8" http-equiv="Content-Type">
  <meta content="width=device-width,initial-scale=1,user-scalable=no" name="viewport">
  <meta name="apple-mobile-web-app-capable" content="yes">
  <meta name="apple-touch-fullscreen" content="yes">
  <meta name="format-detection" content="telephone=no,address=no">
  <meta name="apple-mobile-web-app-status-bar-style" content="white">
  <meta http-equiv="X-UA-Compatible" content="IE=edge,chrome=1" >
  <title></title>
  <script>
    !function(n){function e(){var e=n.document.documentElement,t=e.getBoundingClientRect().width;e.style.fontSize=t>=640?"40px":t<=320?"20px":t/320*20+"px"}n.addEventListener("resize",(function(){e()})),e()}(window); // 处理rem,以750px为准
  </script>
</head>
<body>
  <div id="app"></div>
</body>
</html>
最后用 yarn dev:h5 或 yarn dev:weapp 编译到目标平台就能看到示例了