Hardware
You can use any drone of your choice equipped with following components and running ArduCopter to use these instructions to run NVIDIA Redtail project on it.
- Any of NVIDIA Jetson TX1/TX2 as companion computer
- An optical flow sensor for navigation in GPS denied environments
- A rangefinder sensor required by optical flow sensor
- A front facing camera connected to the companion computer
Although the choice of hardware is out of scope of this wiki, you can find information on our choice of hardware and design for this project here.
We assume you have your companion computer prepared and Apsync is installed on your TX1/TX2. In this case your companion computer creates a WiFi access point with both SSID and password set as ardupilot. We suggest adding a small WiFi antenna to your Jetson board if you are using Auvidea J120 breakout board for this module, we have used a Taoglas Limited FXP522.A.07.A.001 dual channel 3dBi antenna which is very small and can lay flat on one part of your drone's surface and also is powerful enough to be able to connect to Jetson module using WiFi from several meters away.
Connect to this WiFi access point using a computer you can SSH to Jetson module from. Apsync creates an apysync username for Jetson and sets it as it's default login, asking you to set the password for this account during installation. It also sets the default IP address of the module to 10.0.1.128 static address. You can either use the IP address to SSH to the module or add apsync 10.0.1.128 to your known hosts in /etc/hosts and use the hostname for SSH:
$ ssh [email protected]To speed up this login process and avoid entering the password on each login, we suggest using ssh-copy-id or you can define the following alias:
$ echo 'alias sshap="sshpass -p '<your-password>' ssh [email protected]"' >> ~/.bashrc
$ source ~/.bashrc
and in the future you can SSH with:
$ sshapThere is a shell script prepared which downloads and installs all the dependencies as well as building the code for this project, make sure Jetson module has internet access through LAN cable connected to J120:
$ wget https://raw.githubusercontent.com/Voidminded/redtail/master/ros/scripts/jetson_ros_install.sh
$ ./jetson_ros_install.sh
This script needs a small interaction such as accepting the licences and entering super user's password for installing dependencies such as ROS from aptitude. This script installs all the dependencies, clones a copy of this project, creates a Catkin workspace in ~/ws using Python Catkin tools and build all the required codes.
In order to communicate to mavlink through mavros, make sure you have opened a UDP port in your mavlink-router. Edit ~/start_mavlink-router/mavlink-router.conf and add the followings at the end:
[UdpEndpoint to_ros]
Mode = Normal
Address = 127.0.0.1
Port = 14855
When this script finishes, you are ready to test and fly.
Now that you have installed everything it's time to test the components and make sure everything works.
There is a ROS launch file that launches a USB camera connected to J120's USB using gscam, runs TrailNet CNN node, and uses Redtail debug node to provide debug information. Try:
$ roslaunch redtail_debug ap_gscam_robot.launchWhen you are running the CNN for the first time, it takes a while to for the model to be compiled and loaded. The compiled model will be cached so it's just first-time delay only.
Running this, the camera should start streaming the image on /camera/image_raw ROS topic, caffe_ros node will subscribe to this topic and use the images to select a turning angle for drone using TrailNet.
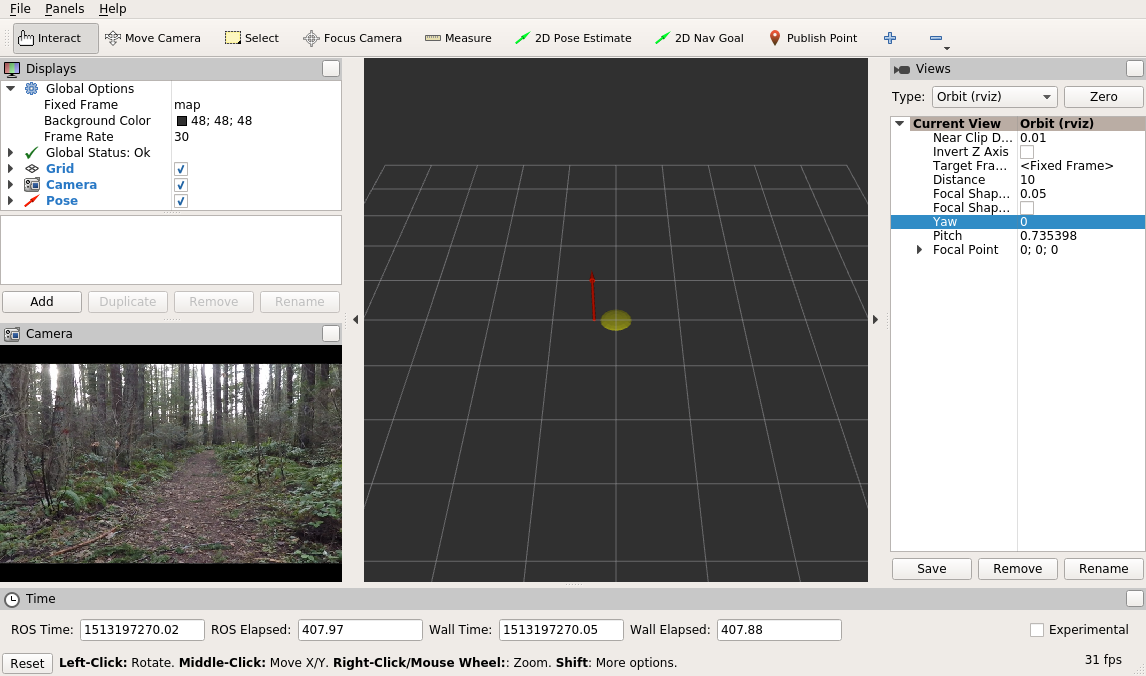
You can run rviz on the host computer to see the image and model's output and make sure everything is running correctly. Whenever you want the host computer to connect to ROS components on Jetson, you have to export the ROS_IP and ROS_MASTER_URI on the working terminal (or add it to your bashrc, if you prefer, although not recommended), assuming the host computer's IP address is 10.0.1.20 (the first IP address assigned by WiFi access point)
$ export ROS_MASTER_URI=http://10.0.1.128:11311
$ export ROS_IP=10.0.1.20
Now you can run rviz on the host computer and check the image and CNN model's output using this file:
$ rviz -d <path-to-redtail-repo-on-host-pc>/ros/packages/redtail_debug/rviz/ap.rvizPoint the drone toward trails and you should see something like:
NOTE: if your host IP is anything other than 10.0.1.20 (in case you have more than one device connected to WiFi access point), please use the correct IP address and launch the launch file with correct host_ip argument if you want gscam to stream the video directly to your host computer:
$ roslaunch redtail_debug ap_gscam_robot.launch host_ip:=<your-host-ip>Connect your wireless joystick's dongle to the second USB port on J120, and make sure you can see it in /dev/input/js*, then use the following launch file to launch the joy node and mavros node:
$ roslaunch px4_controller ap_robot_mavros.launchIf your joystick's address is different, or you have opened another port than 14655 in mavlink-router for mavros, please edit the launch file or pass them as argument to your launch file:
$ roslaunch px4_controller ap_robot_mavros.launch joy_dev=/dev/input/<your-joy-address> fcu_url="udp://:<your-mavros-port-in-mavlink-router>@After launching this file mavros should connect to mavlink and show the FCU information in the terminal. To test your joystick, in another terminal:
$ rostopic echo /joy
You should see all the messages from your joystick, find buttons 0 and 1 on your joystick which you need to trigger and stop autonomous navigation with, also axis 0 for altitude change, 1 for manual yaw correction, and 3 for manual forward/backward movement.
Please make sure that you have a safe environment to fly the drone. In particular:
- Make sure you know and obey all relevant local laws and regulations.
- Make sure there is a safety pilot with you who can use RC transmitter connected to drone to take control, override the controller commands and disable drone motors directly from the transmitter via a "kill switch".
- For the very first experiments we recommend flying the drone in an open field where operating RC aircraft and drones are permitted. As an additional safety measure, we suggest trying the drone to the ground using sufficiently long and lightweight rope.
- Make sure the drone flies stably and hover completely stable using optical flow sensor in Loiter mode and with no issues before running the code on Jetson and switching to autonomous mode.
- Make sure you have run the whole stack once in the simulator and are completely comfortable with manoeuvring the drone around with joystick and are sure which two buttons on joystick activate/deactivate the autonomous navigation
- Power on the transmitter and set it on Loiter flight mode.
- Power on the drone by connecting the battery.
- In some cases the PX4Flow can not be initialized correctly by connecting the battery, you need to power on the flight controller through USB first and then connect the battery.
- Wait for flight controller to finish the initialization process.
- Because optical flow requires good sonar/range finder data when the optical flow is enabled, While the vehicle is disarmed lift the vehicle straight up to at least 50cm but no higher than 2m (if the rangefinder sees a distance of over 2m you will need to restart the flight controller). You should hear the tone if you have a buzzer and the LEDs will change to green/blue (with/without GPS lock).
- If you have safety switch on the drone, press and hold to deactivate it
Check that the Jetson is powered as well. Wait a minute or two for the Jetson to boot and WiFi access point appears in your WiFi list and connect to its WiFi network. Next, SSH to the board.
You need to run several components on the drone, it's your call to use terminal multiplexer (tmux) which is already installed on Jetson or open several terminals on host computer and SSH through each one. Though it is strongly recommended to use tmux, so that if the WiFi connection between the host computer and Jetson get disconnected, the system keep running without any issue.
- Launch mavros and joystick nodes:
$ roslaunch px4_controller ap_robot_mavros.launch- You can choose to run the joystick node on the host computer instead of connecting it to the J120 and having to be close to the drone to control it, but this is not recommended. On the host computer:
$ export ROS_MASTER_URI=http://10.0.1.128:11311
$ export ROS_IP=10.0.1.20
$ rosrun joy joy_node _dev:=/dev/input/js0 _autorepeat_rate:=30- Ask mavros to publish all the topics and set the stream rate
$ rosrun mavros mavsys rate --all 10- Run the camera, TrailNet, and redtail_debug nodes:
$ roslaunch redtail_debug ap_gscam_robot.launch- Running the controller node:
There are two ways to run the controller, we are strongly recommending to run this node with the default setting in the launch file (
alt_gain=0.0) after taking off manually and hovering stably in Loiter mode. Position the drone in the desired location and orientation:
$ roslaunch px4_controller ap_robot_controller.launchBut if you like the controller to automatically arm the drone, take off, and gain altitude please pass the desired altitude and a floating point number to alt_gain parameter in launch file:
$ roslaunch px4_controller ap_robot_controller.launch alt_gain:=1.5Be alerted! that if you launch the controller in second method while the drone is in the air, it will gain alt_gain meters altitude in addition to current altitude and it can easily crash to the trees above the trail.
-
Check the console and wait for the controller's state machine to go to NAVIGATION state.
-
Make sure the drone can get commands from the controller by moving the drone slightly forward/backward using right stick on the joystick
-
Position the drone on the trail and press and release A button on the joystick. The drone should start flying along the trail. You can disable autonomous mode and stop the drone using B button. You can also control the drone with the joystick or transmitter even in autonomous mode - the joystick and transmitter commands override the DNN.
WARNING: There is a known issue that the controller stops publishing control commands on /mavros/setpoint_raw/local after takeoff, we are working on resolving this issue.