-
Notifications
You must be signed in to change notification settings - Fork 187
Translating a Locale
So you're tired of getting told that BigWigs is missing translations for your locale and you're willing to help but you're not quite sure how? It's easier than you think!
It also goes without saying, but if you need any help, feel free to ask on Discord.
PS. If you really have some spare time, consider translating for LittleWigs as well. (Just the current expansion is fine 😅)
You know how to use Git. You may even have the repo forked.
But where are the locale files?
Here:
Core/Locales/common.[locale].lua
Locales/[locale].lua
Plugins/Locales/[locale].lua
And here:
[raid]/Locales/[locale].lua
I'm not going to do a guide on how to maintain a fork, but if you're fuzzy on how pull requests work, you can check out Creating a pull request from a fork on GitHub.
If you're not comfortable using Git directly, you can edit the files right on GitHub.
If you don't have a GitHub account, you're going to need to create one before you can start making changes.
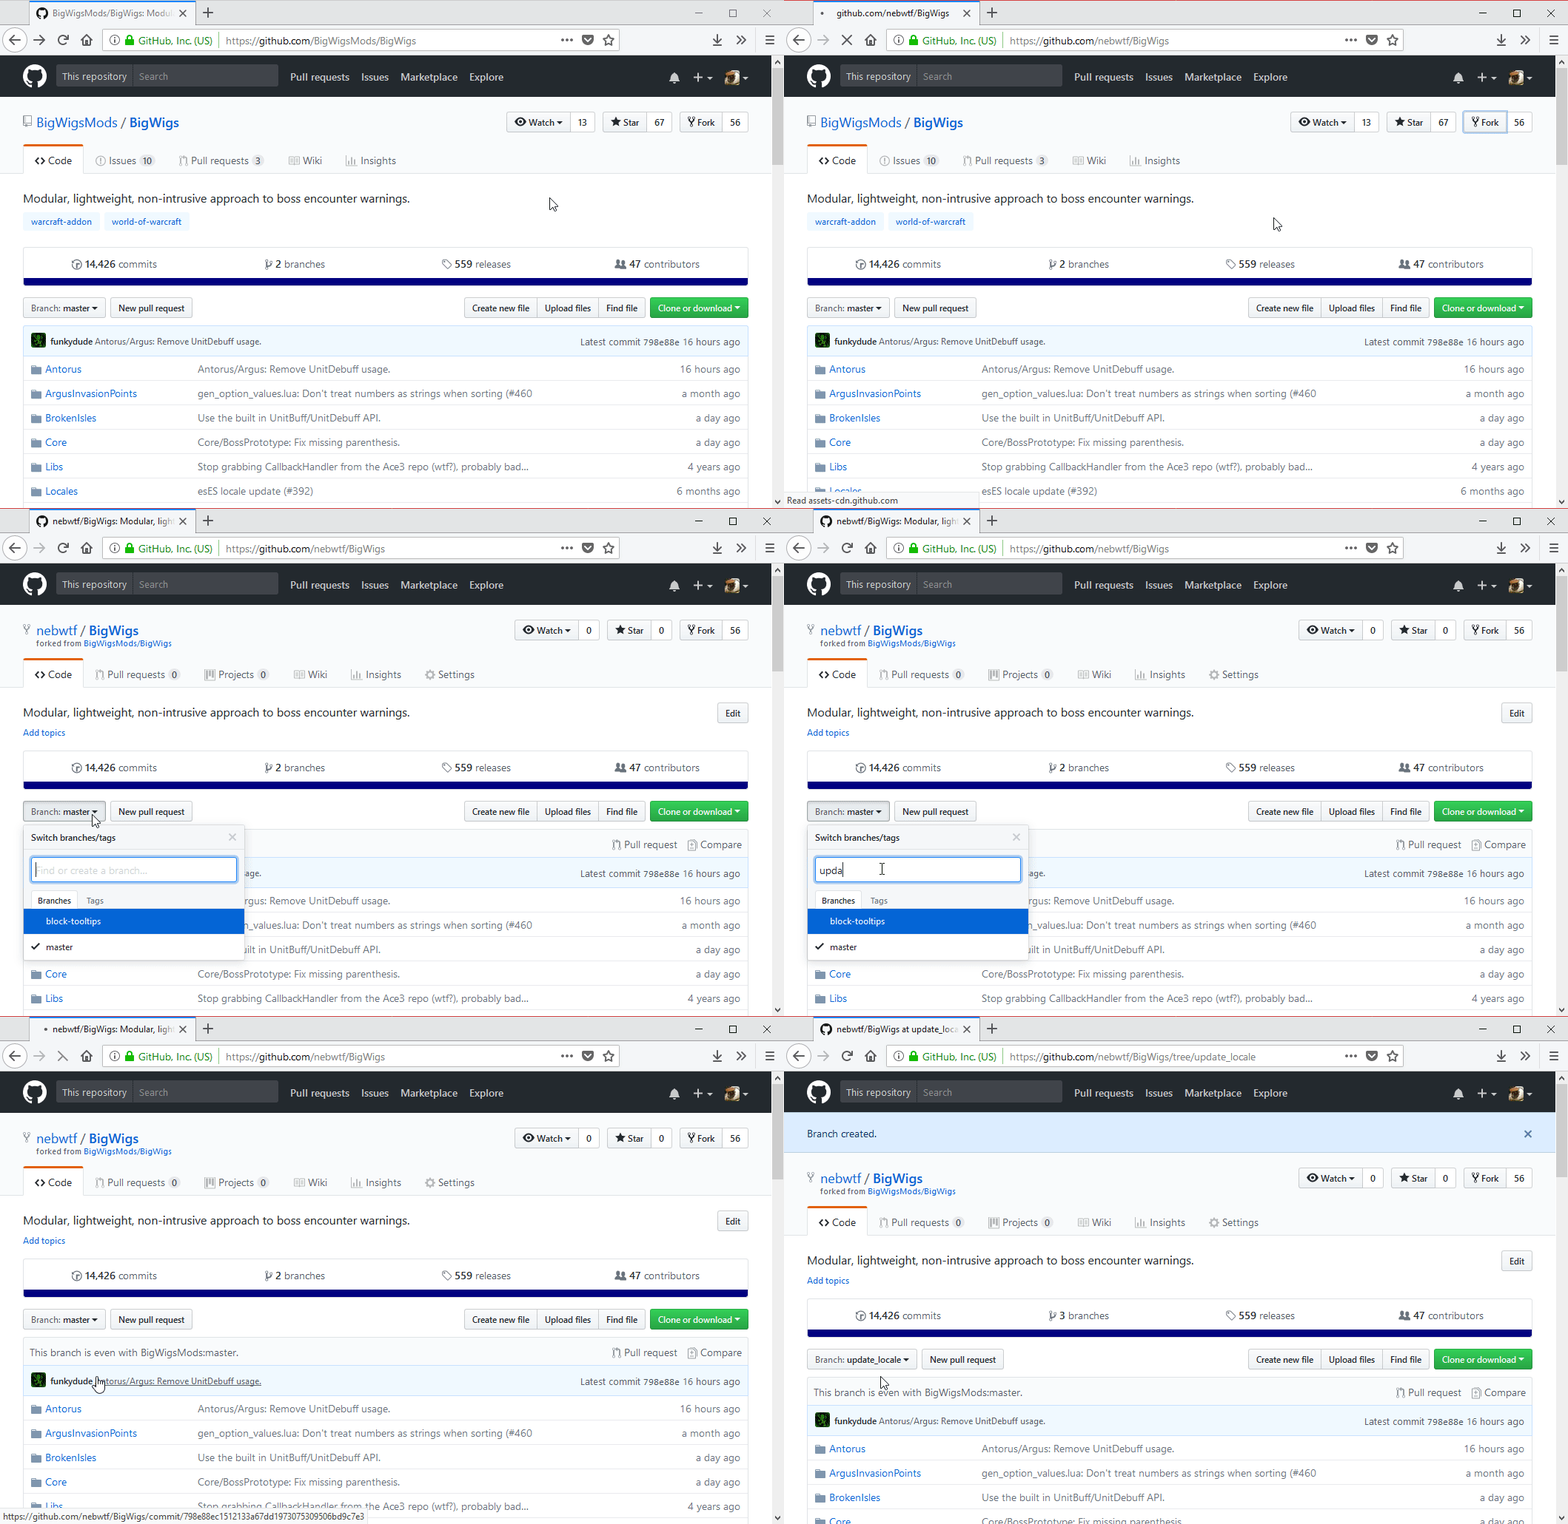
First of all, you need to create a fork, or copy, of the main repository. It's in your fork that you'll be making the changes that you'll eventually submit back to the main repository.

Once you've made your fork, it's a good idea to create a new branch and name it something related to what you're going to work on. We'll be using this branch to group together our locale changes.
While you can skip creating a branch, it's a good habit to form while working on changes in Git. Not creating a branch will save all your changes in the default or "master" branch.
Now that you have your personal repository set up, it's time to make some changes!
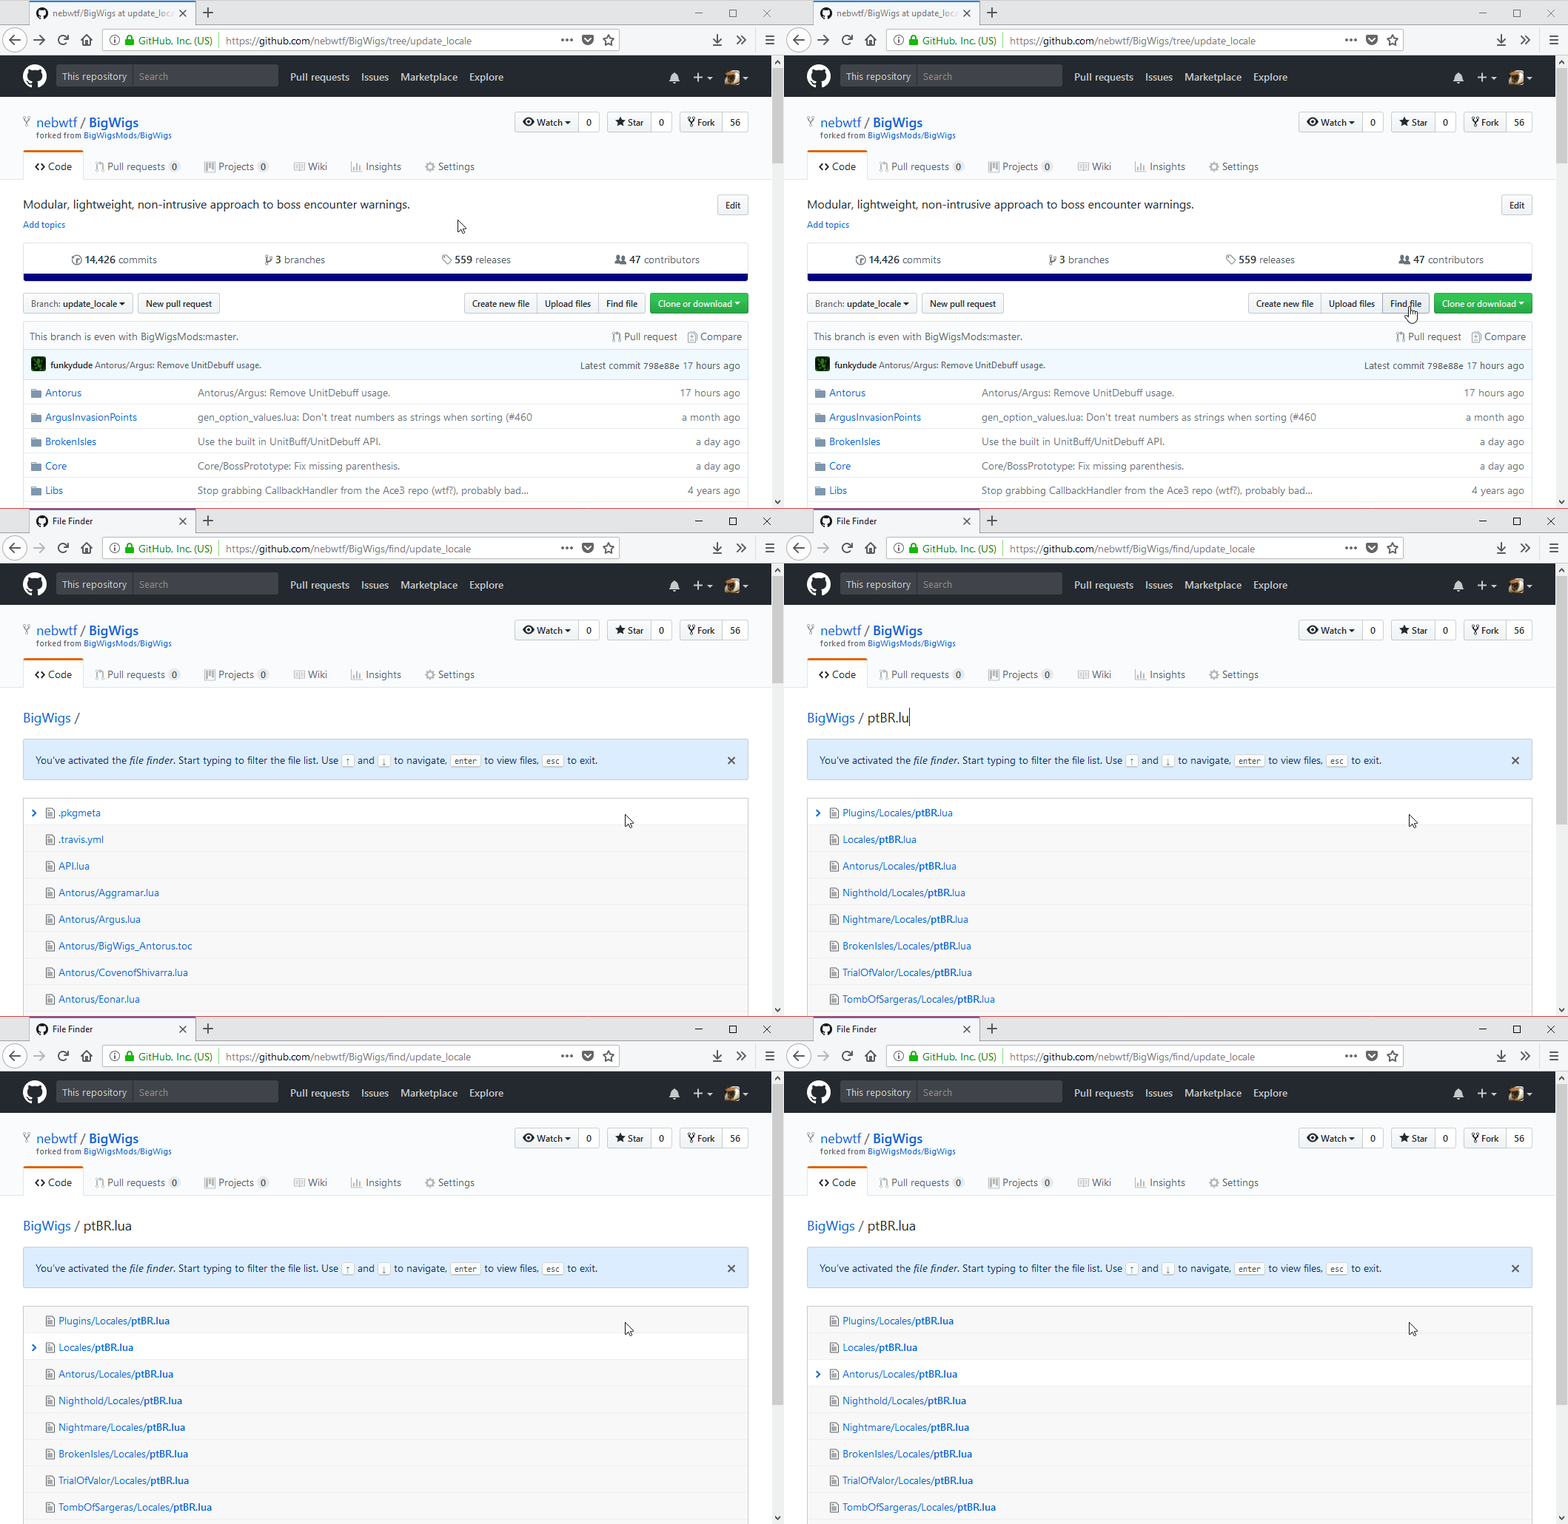
To find which files might need to be updated for your locale click on Find file to open the file finder and type in your locale followed by .lua. This
should list all of the locale files for your locale.

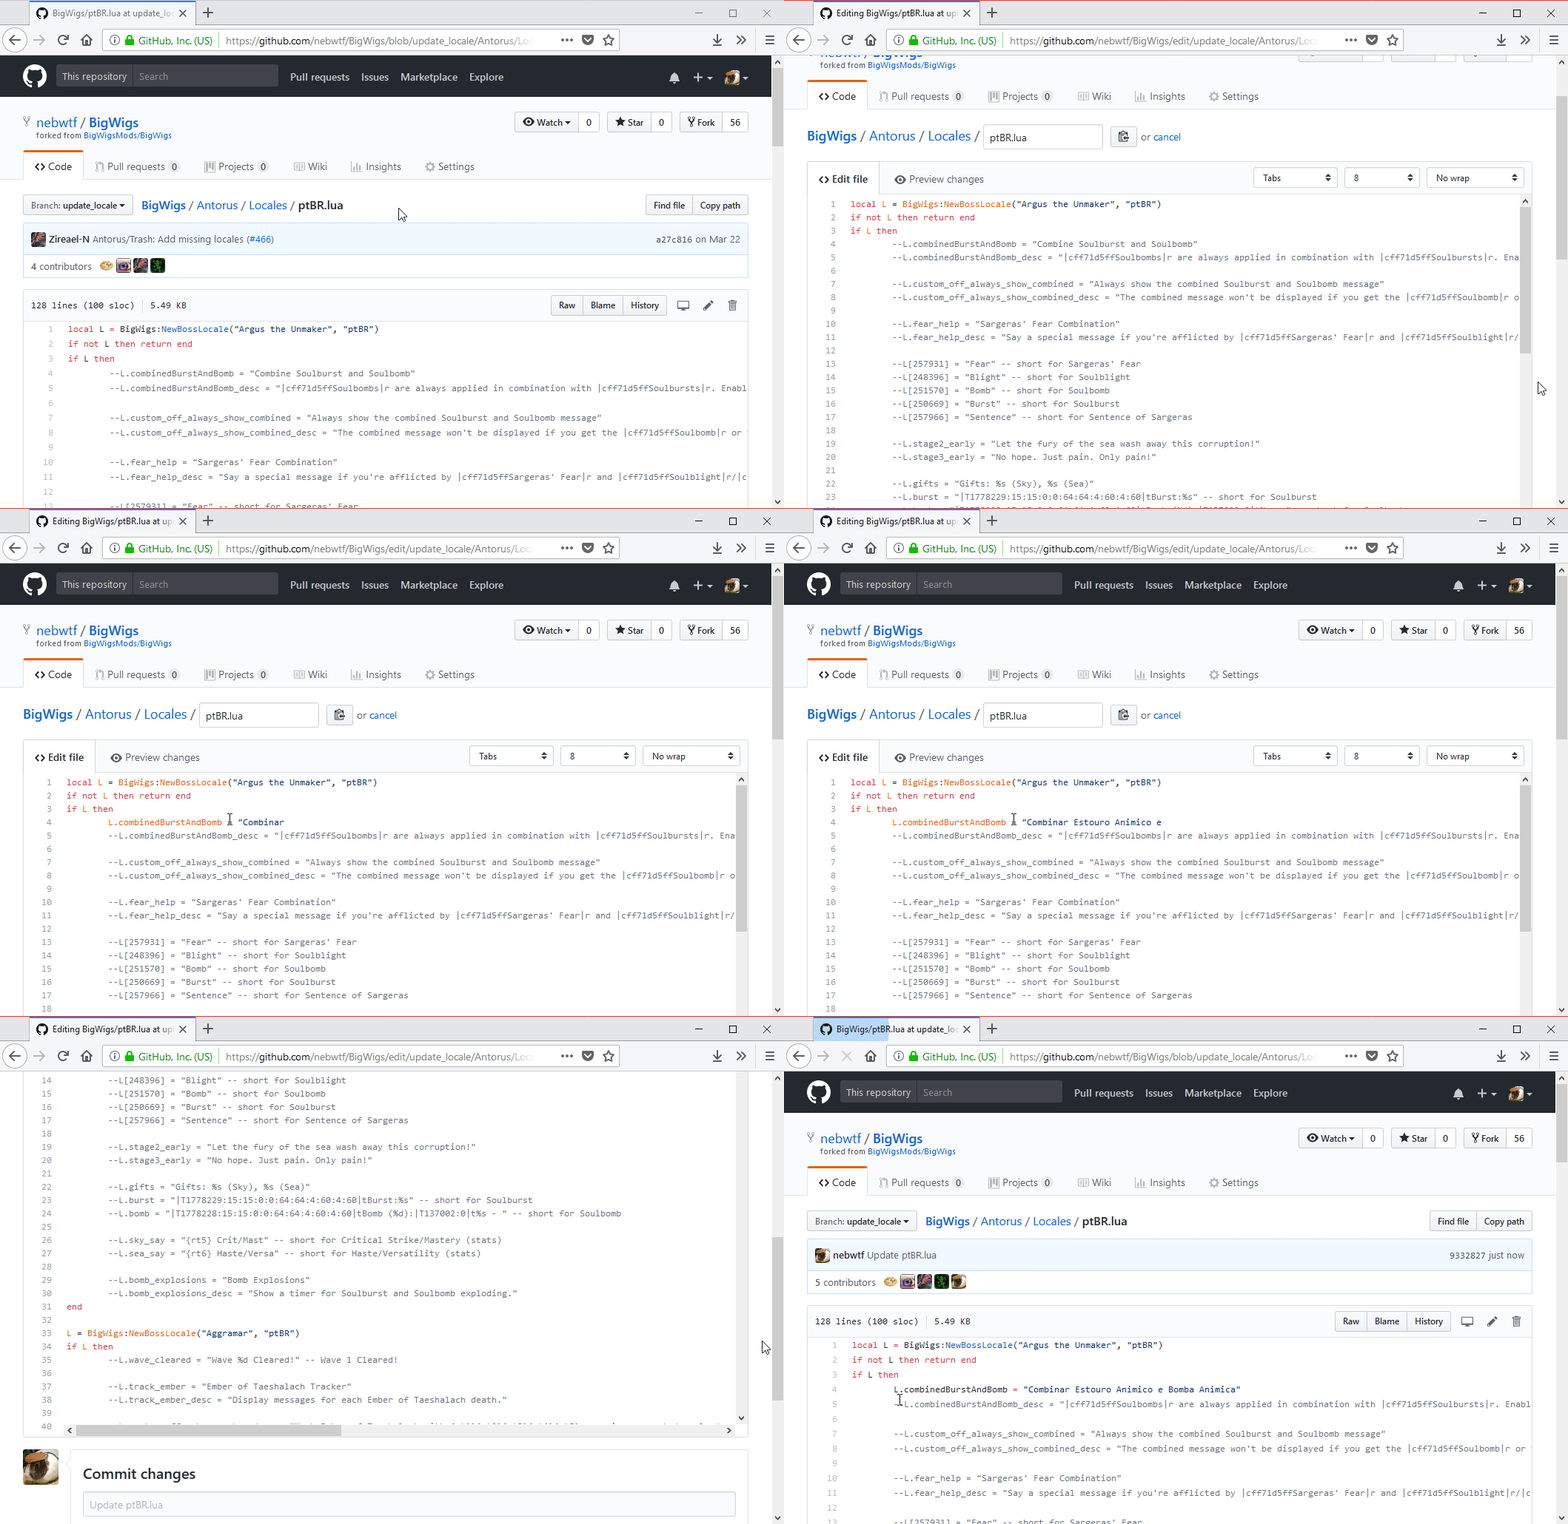
After picking a file, make sure the correct branch is selected in the dropdown to the left of the file name, then click the edit button to start editing.
The lines that need to be translated will be commented out with two hypens (--) at the start of the line and the text will be grey. This means the line is currently ignored. To start your edit, remove the hypens (uncomment the line) then replace the quoted text with your translation.
Of course you can also update current translations if you see something that could be worded better.

When you're done translating the file, click the green Commit changes button
to save your changes as a commit. Don't worry about changing the commit title
or description as they ultimately won't be used.
Keep editing files and making commits until you're happy with everything. You can go back and edit a file you've already made changes on and make another commit if needed. All of your changes will be combined into a single commit at the end, so don't worry about making too many.
Now it's time to create a pull request to submit your changes back to us!
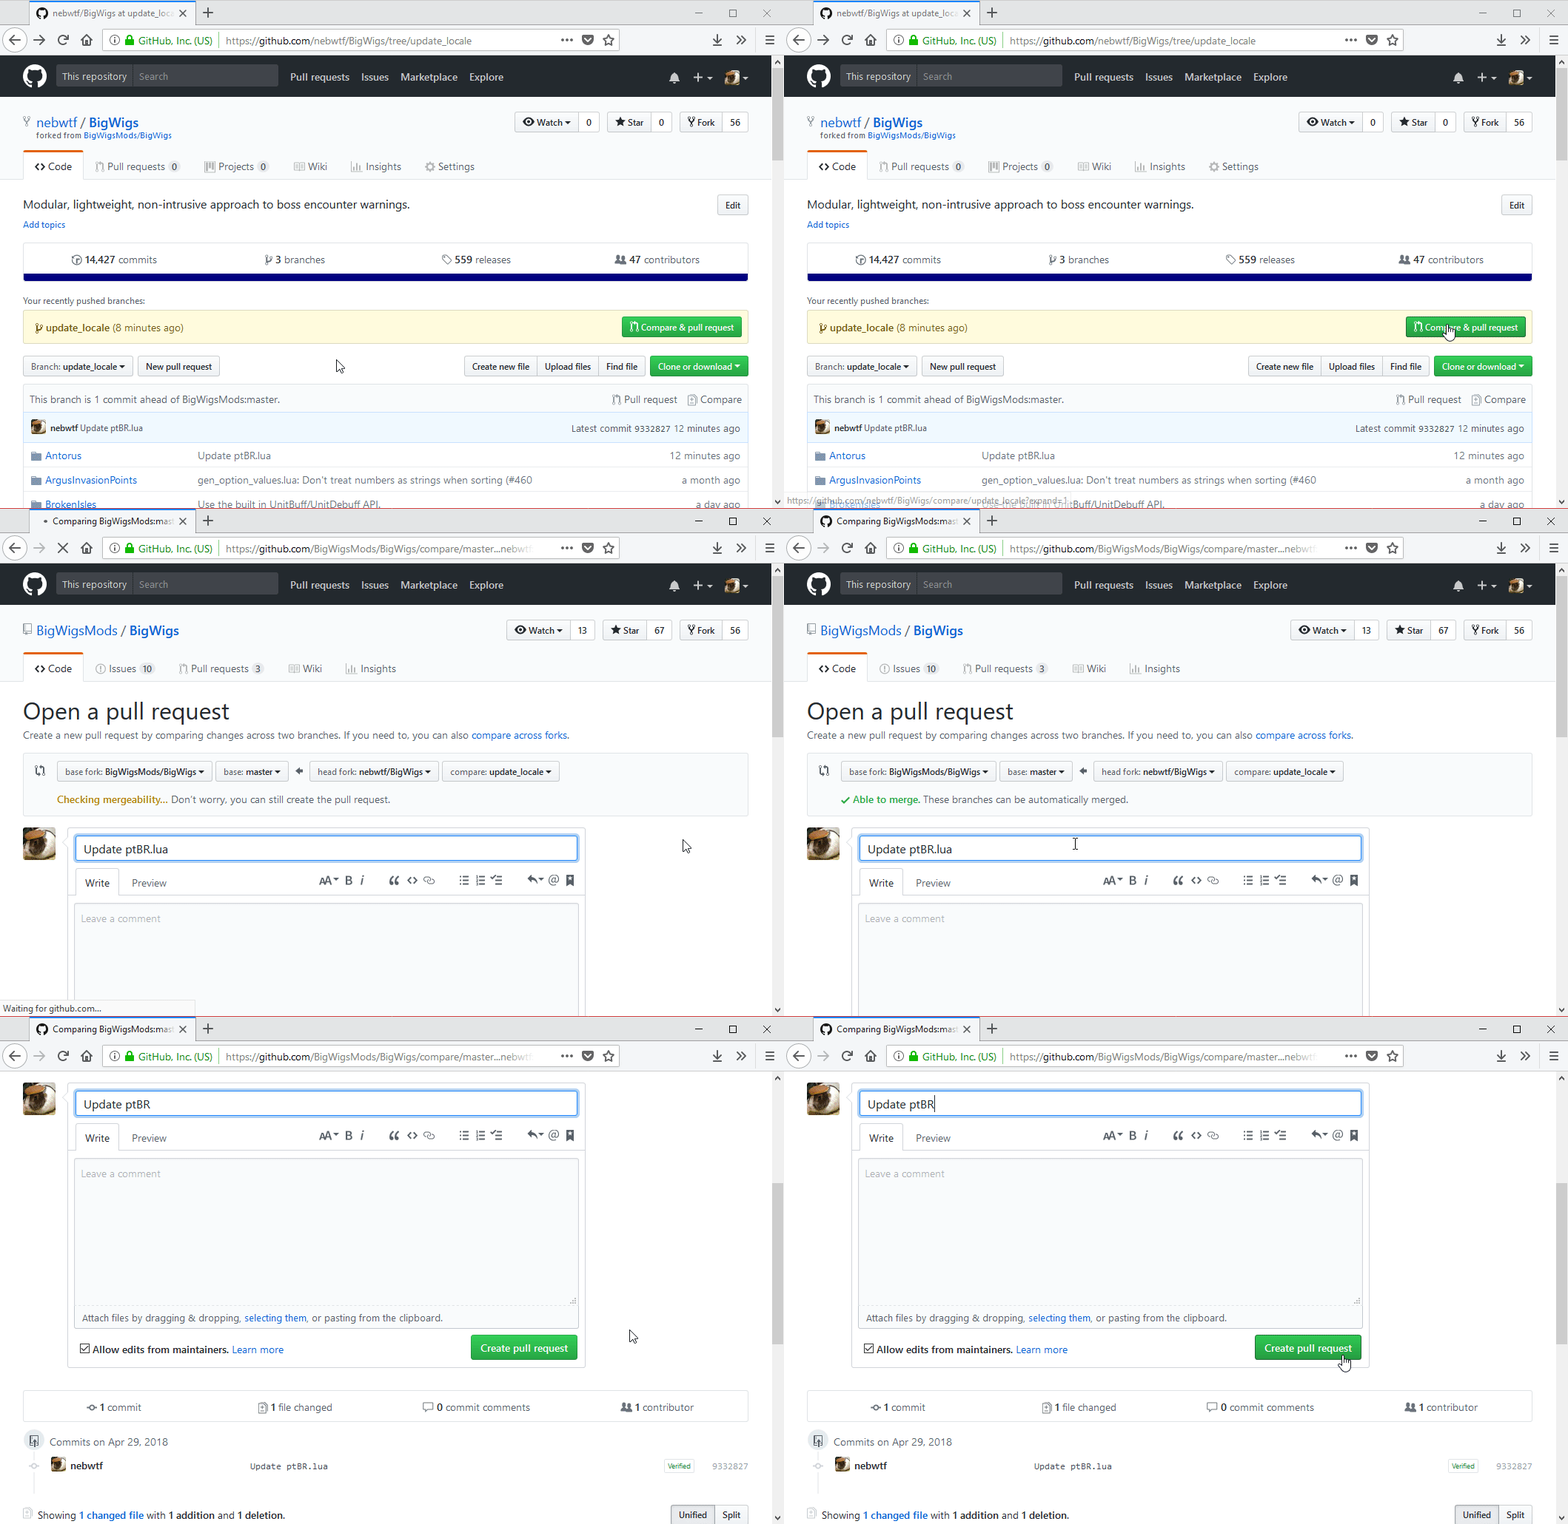
If you've been back to the main code page for your repository or the main
repository, you've probably seen a yellow box with a green Compare & pull request button in it. It's time to click on it to make a pull request.

The "open a pull request" page will show you all the commits you've made and
what their changes are. Review the changes to make sure everything looks
correct, fix up the title, and hit the Create pull request button.
You've done it! Thank you so much for contributing! 🎉
Someone will eventually review the pull request and either approve it or ask you to fix something. Odds are it'll be approved without comment unless the commit bot finds a syntax error.
Maybe you accidently deleted a line without adding your translation, maybe you missed a quotation mark and got an angry email about your build being broken :scream: Don't worry, you can fix it!
Just go to the GitHub page for your fork and make sure you're on the same branch that you used in your pull request. Then navigate to the file you need to fix and edit it like you did before. When you hit commit, it'll automatically update the pull request with your changes! Do that as many times as you need then drop a comment in the pull request giving a 👍
Eventually you'll satisfy the BigWigs overlords, your changes will be merged in and you get to tell everyone you're an official contributor 😎
After your changes are merged, GitHub will show a button to delete the branch (assuming you created one) in the pull request. Is it safe to click it? Go ahead, if you need to make more changes you can always create another one.
In fact if you don't plan on downloading Git to use locally, it's probably best to just delete your fork entirely as GitHub doesn't offer an easy way to keep the fork up-to-date with the repository it came from.
To delete the fork, click on the Settings tab, scroll all the way down to the
Danger Zone and click Delete this repository. The next time you want
contribute, you'll just have to fork again. Easy peasy.
If you'd like to learn more about Git, you can check out the Git and GitHub learning resource on GitHub.