In this Code Pattern, we'll demonstrate how to monitor a machine learning model using Watson OpenScale. You can using any model deployment serving engine, but we will create one using a Python Flask wrapper with Watson Machine Learning to simulate this.
When the reader has completed this Code Pattern, they will understand how to:
- Create a data mart for a machine learning model with Watson OpenScale.
- Log the payload for the model using Watson OpenScale
- Configure OpenScale to monitor that deployment for Fairness, Quality, and Drift.

- User deploys application server on the IBM Cloud using Kubernetes and Docker.
- User creates a Jupyter notebook on Watson Studio and configures Watson OpenScale and Databases for PostgreSQL.
- Watson OpenScale is used to monitor a Machine Learning model for payload logging and quality.
- The application server is used for scoring the deployed model.
- A Machine Learning provider, i.e running in a VM on IBM Cloud using the provided Flask app.
- An instance of Cloud Pak for Data.
- Watson OpenScale provisioned on Cloud Pak for Data.
- IBM Cloud Object Storage (COS)
- Clone the repo
- Create custom machine learning provider
- Create a Watson OpenScale service
- Create COS bucket and get credentials
- Create a notebook on Cloud Pak for Data
- Run the notebook
Clone the monitor-custom-ml-engine-with-watson-openscale locally. In a terminal, run:
git clone https://github.com/IBM/monitor-custom-ml-engine-with-watson-openscaleUse your existing machine learning providor
Setup on a VM
The code in flask.py can be used to start a Gunicorn/Flask application that can be hosted in a VM, such that it can be accessable from your CPD system. This code does the following:
- It wraps a Watson Machine Learning model that is deployed to a space.
- The hosting application URL should contain the SPACE ID and the DEPLOYMENT ID. The app can be used to talk to the target WML model/deployment.
- Having said that, this is only for this tutorial purpose, and you can define your Custom ML provider endpoint in any fashion you want, such that it wraps your own custom ML engine.
- The scoring request and response payload should conform to the schema as described here at: https://dataplatform.cloud.ibm.com/docs/content/wsj/model/wos-frameworks-custom.html
- To start the application using the below code, make sure you install the python packages using:
pip install -r requirement.txtor
Run on RedHat OpenShift
You will need a running OpenShift cluster. You can provision OpenShift on the IBM Cloud.
-
Using the OpenShift web console, select the
Application Consoleview.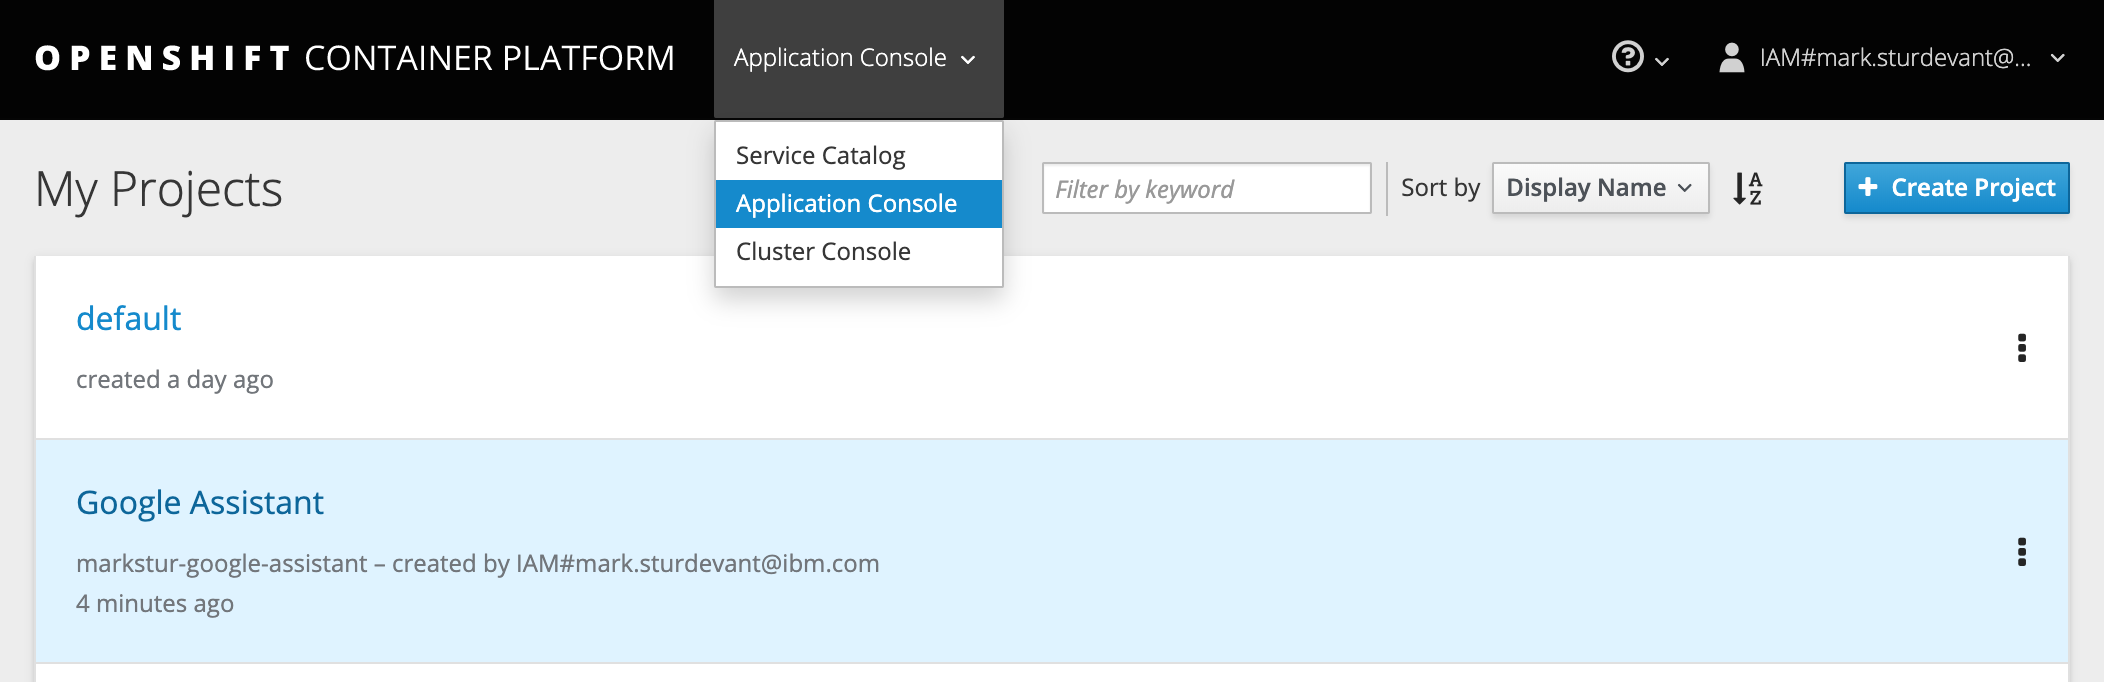
-
Use the
+Create Projectbutton to create a new project, then click on your project to open it. -
In the
Overviewtab, click onBrowse Catalog.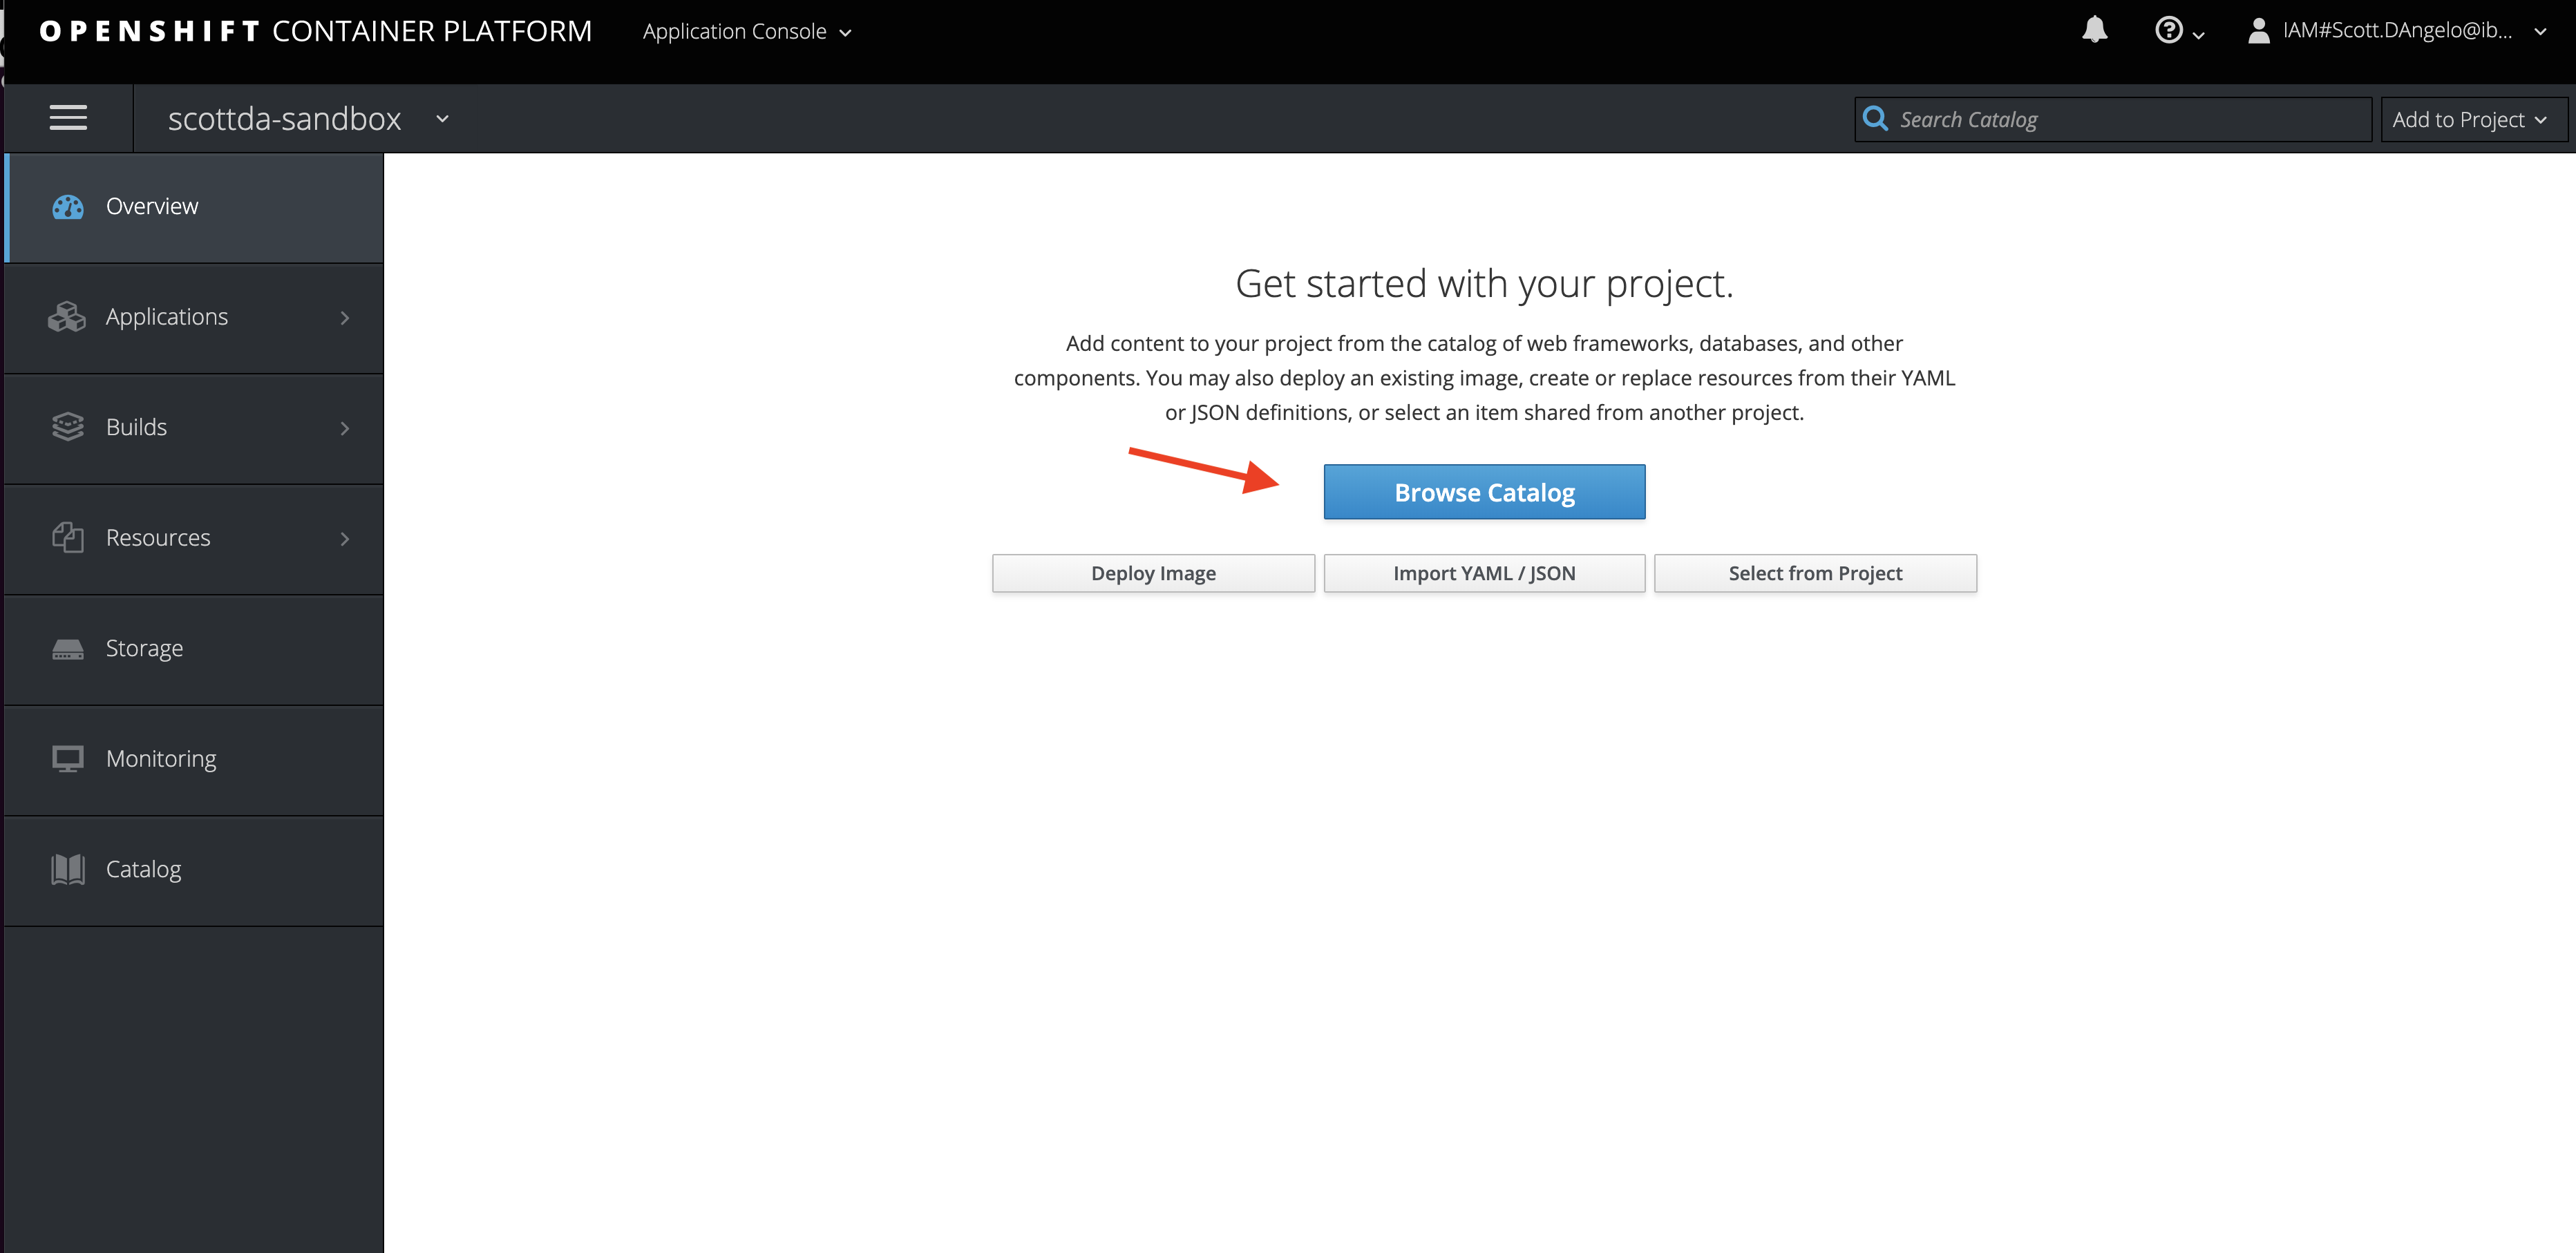
-
Choose the
Pythonapp container and clickNext.
-
Give your app a name and add
https://github.com/IBM//monitor-custom-ml-engine-with-watson-openscalefor the github repo, then clickCreate.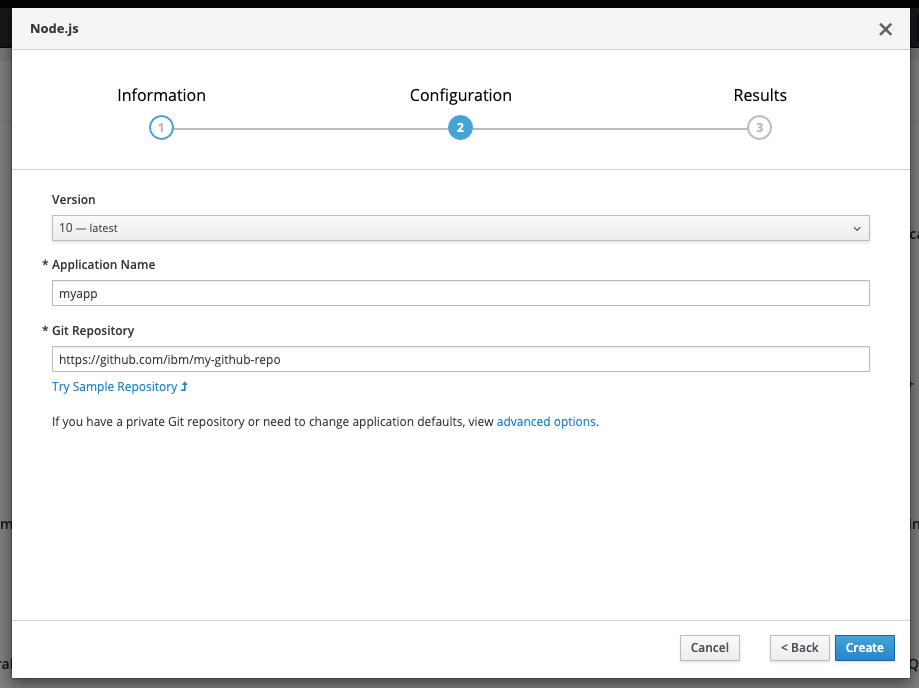

-
Click on the
Resourcestab and chooseConfig Mapsand then click theCreate Config Mapbutton.- Provide a
Namefor the config map. - Click
Add Itemand add a key namedURLand underEnter a value..., enter auth url of Cloud Pak for Data instance under which the prediction model is deployed. - Click
Add Itemand add a key namedUSERNAMEand underEnter a value..., enter username to Cloud Pak for Data instance under which the prediction model is deployed. - Click
Add Itemand add a key namedPASSWORDand underEnter a value..., enter the password to Cloud Pak for Data instance under which the prediction model is deployed. - Hit the
Createbutton. - Click on your new Config Map's name.
- Click the
Add to Applicationbutton. - Select your application from the pulldown.
- Click
Save.

- Provide a
-
Go to the
Applicationstab, chooseDeploymentsto view the status of your application.

- From the OpenShift or OKD UI, under
Applications▷Routesyou will see your app.- Click on the application
Name. - Under
TLS Settings, click onEdit. - Under
Security, check the box forSecure route. - Hit
Save.
- Click on the application
-
Go back to
Applications▷Routes. You will see your app. -
Save the URL for the Route. You will use this in the configuration notebook in the section
1.2 Configure credentialsfor the variable CUSTOM_ML_PROVIDER_SCORING_URL.
Setup OpenScale on Cloud Pak for Data if needed
Note: This assumes that your Cloud Pak for Data Cluster Admin has already installed and provisioned OpenScale on the cluster.
-
In the Cloud Pak for Data instance, go the (☰) menu and under
Servicessection, click on theInstancesmenu option.
-
Find the
OpenScale-defaultinstance from the instances table and click the three vertical dots to open the action menu, then click on theOpenoption.
-
If you need to give other users access to the OpenScale instance, go to the (☰) menu and under
Servicessection, click on theInstancesmenu option. -
Find the
OpenScale-defaultinstance from the instances table and click the three vertical dots to open the action menu, then click on theManage accessoption.
-
To add users to the service instance, click the
Add usersbutton.
-
For all of the user accounts, select the
Editorrole for each user and then click theAddbutton.


-
In your IBM Cloud Object Storage instance, create a bucket with a globally unique name. The UI will let you know if there is a naming conflict. This will be used in cell 1.3.1 as BUCKET_NAME.
-
In your IBM Cloud Object Storage instance, get the Service Credentials for use as
COS_API_KEY_ID,COS_RESOURCE_CRN, andCOS_ENDPOINT:

-
In your on-premise Cloud Pak for Data, click
New Project +under Projects or, at the top of the page click+ Newand choose the tile forData Scienceand thenCreate Project. -
Using the project you've created, click on
+ Add to projectand then choose theNotebooktile, OR in theAssetstab underNotebookschoose+ New notebookto create a notebook. -
Select the
From URLtab. [1] -
Enter a name for the notebook. [2]
-
Optionally, enter a description for the notebook. [3]
-
For
Runtimeselect theDefault Spark Python 3.7option. [4] -
Under
Notebook URLprovide the following url: https://raw.githubusercontent.com/IBM/monitor-custom-ml-engine-with-watson-openscale/master/notebooks/WatsonOpenScaleAndCustomMLEngine.ipynb -
Click the
Create notebookbutton. [6]

-
Move your cursor to each code cell and run the code in it. Read the comments for each cell to understand what the code is doing. Important when the code in a cell is still running, the label to the left changes to In [*]:. Do not continue to the next cell until the code is finished running.
-
Add the COS credentials in cell 1.3.1 Cloud object storage details.
-
Insert your BUCKET_NAME in the cell 1.3.1 Bucket name.
-
Either use the internal Database, which requires No Changes or Add your
DB_CREDENTIALSafter reading the instructions preceeding that cell and change the cellKEEP_MY_INTERNAL_POSTGRES = Trueto becomeKEEP_MY_INTERNAL_POSTGRES = False.
This code pattern is licensed under the Apache License, Version 2. Separate third-party code objects invoked within this code pattern are licensed by their respective providers pursuant to their own separate licenses. Contributions are subject to the Developer Certificate of Origin, Version 1.1 and the Apache License, Version 2.