Starting with Blade Engine Tutorial 3
tutorial created by Patricio Land
Previous tutorials:
You can download the full project created in this tutorial from here.
--
As we stablished earlier, normally the screen size will be 1920 x 1080, with a maximum of 4096 x 4096. But, why we’re talking about a oversized screen image? Because sometimes we’re going to need a background way bigger than the actual play zone.
This could be useful in order to make the character walk around the scene or to achieve some nice cinematic effects, very useful for intros where a camera pan is needed. So, guess what? we’re learning some tricks about cameras during this tutorial.
First things first, download the complete set of images for this tutorial from the following link and unzip it.
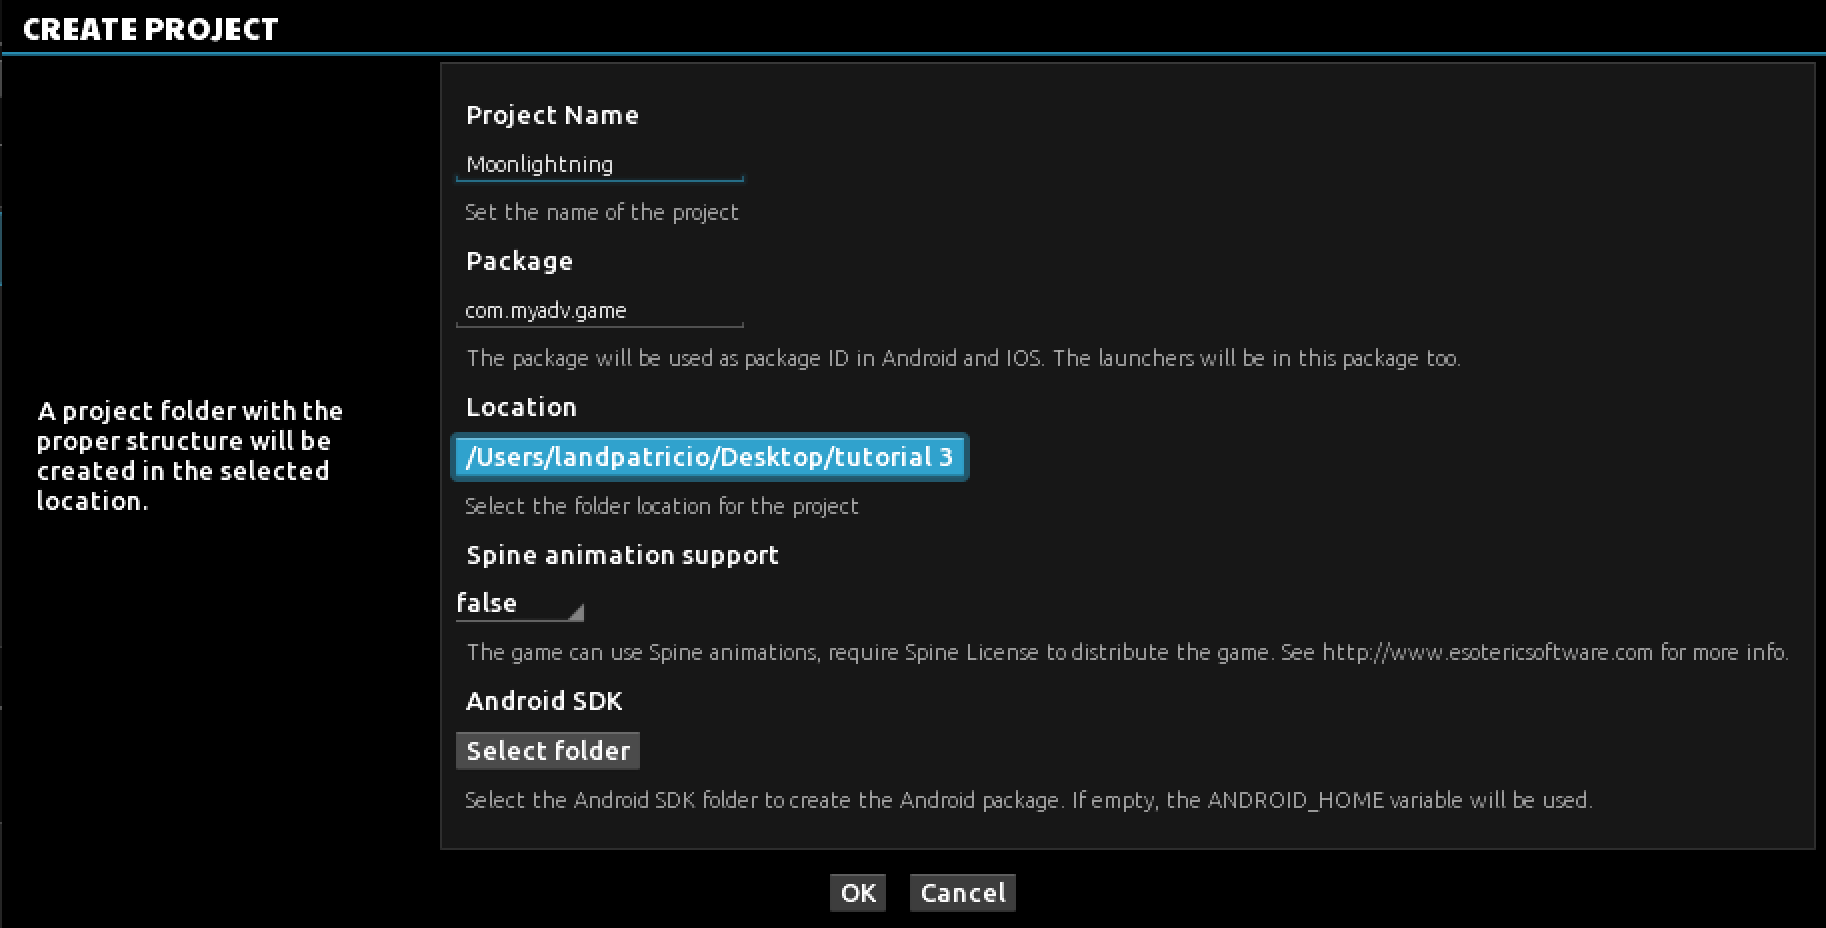
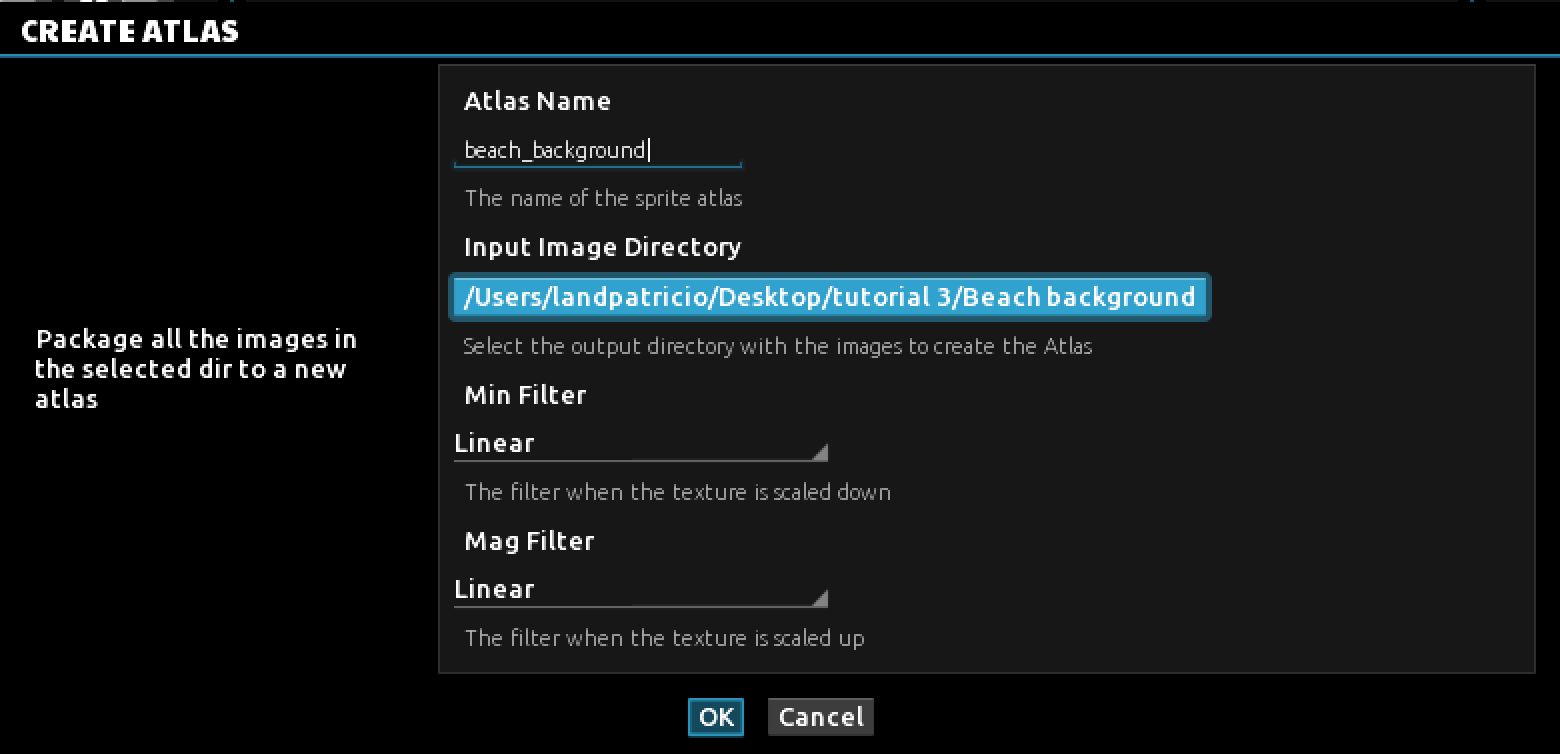
Then create a new project for this tutorial and call it Moonlightning. We’re going to use a large background this time, so add an atlas, name it beach_background and use the beach_large_background.jpg image from the files supplied.
When creating large images keep in mind that in mobile games every byte of free memory counts, so render them using a good compression ratio, and play with the exporting settings of your painting program until you get a decent quality image as small as possible in file size. Now we need to put the background image in place, create a new scene, create one atlas for the background and check your settings against the following image. Then hit OK to proceed.
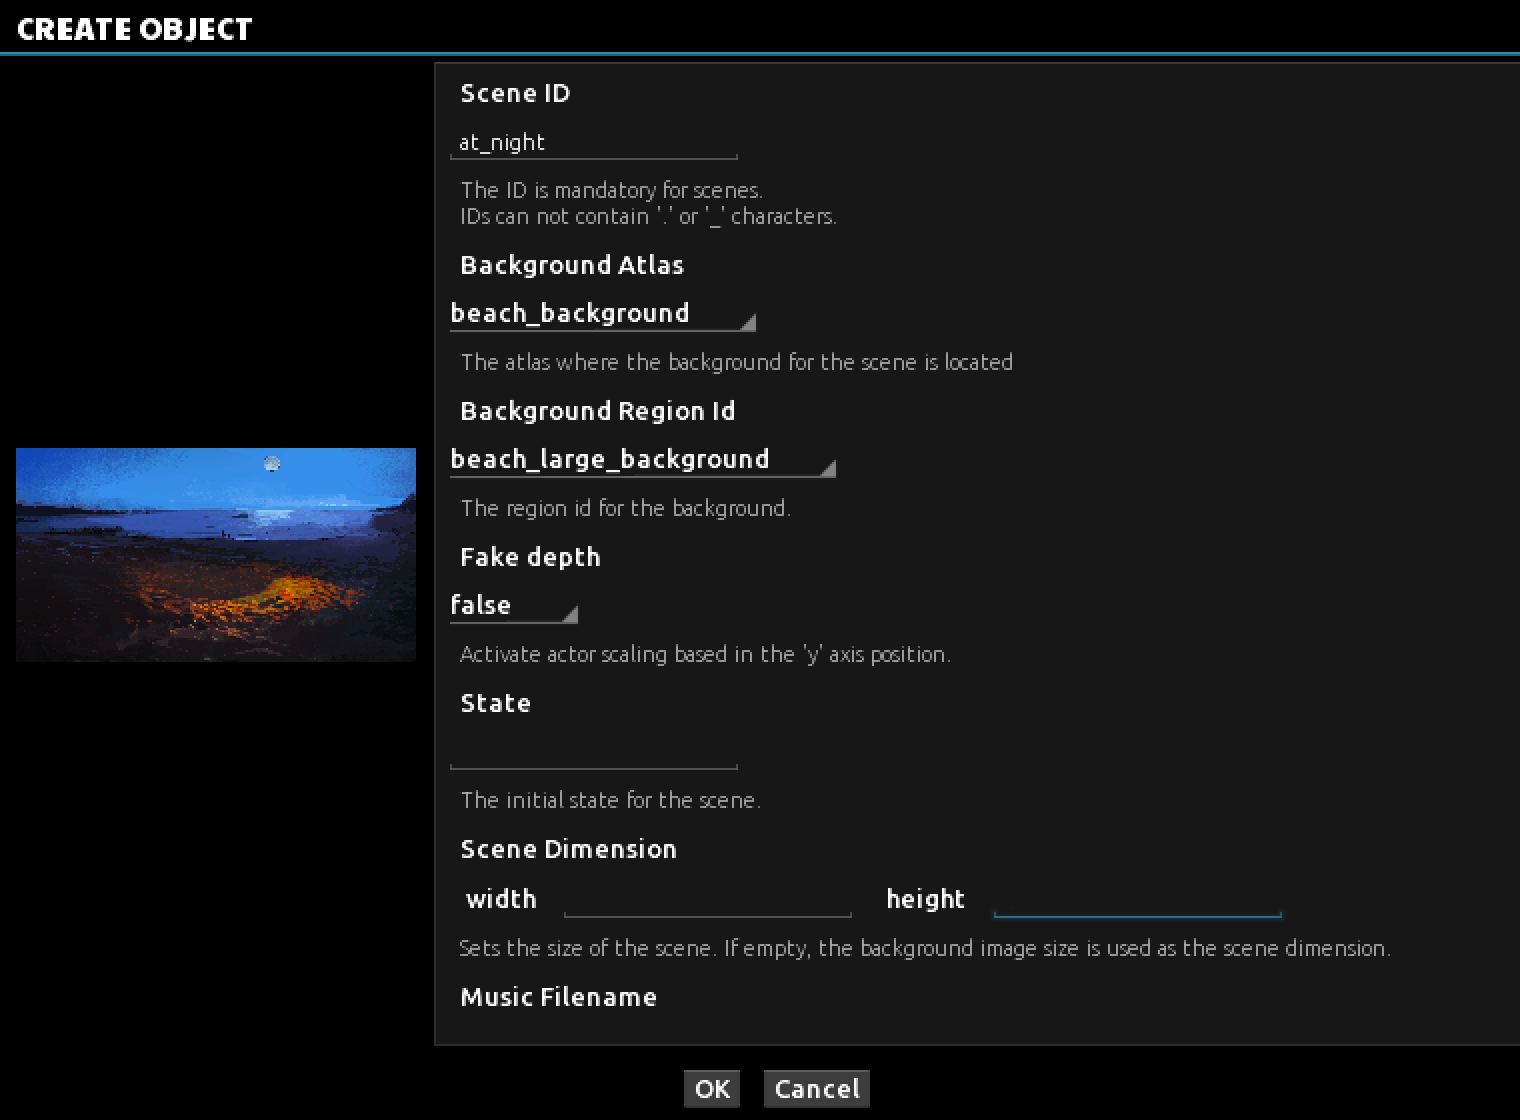
Please note that we can define here the background size, but we should leave this two fields in blank (or with the default value if you prefer) as we’re setting the scene to add a scroll effect in order to let the player walk from one end to the other.
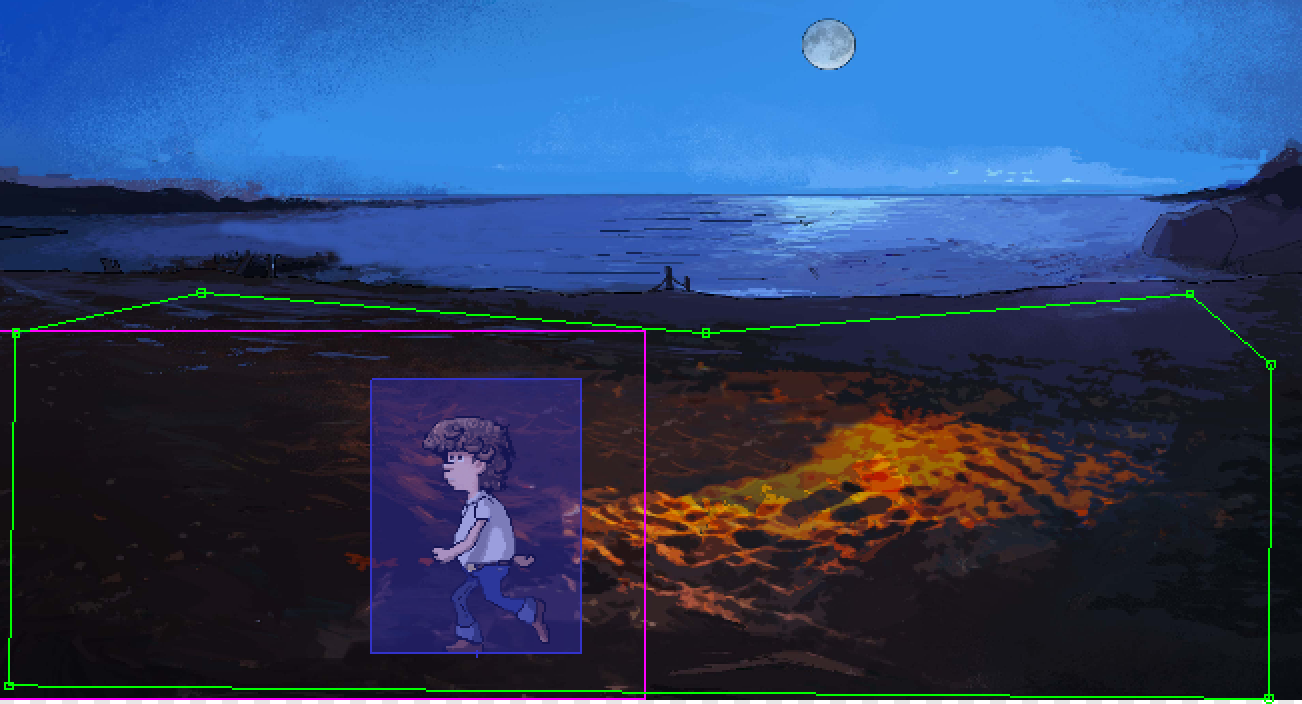
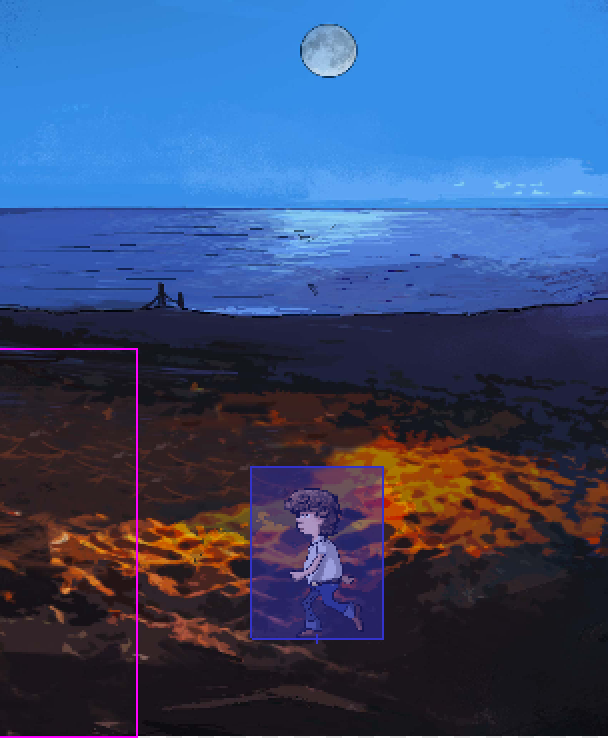
Next thing you’re going to notice is a purple rectangle inside the image we see in the center area of the adventure editor. You got it!, this rectangle represents the current view. So the camera for this scene will only show what’s inside this area…

We’re pretty sure about that, but it’s always a good idea to check every step in the process, so do it. Press the Play button and observe the result. Quite spectacular view, isn’t it?
Now it’s time to add our main player (with at least the walk, stand and talk animation) into the scene. Scale it properly and put the character inside the rectangle. Don’t forget to add a walking zone too of the size of the entire background image, as shown in the picture. If you’re not sure how to do all this check or second tutorial.
Once you are ready do a test of the scene. The character should be able to move around the beach but only inside the 1920 x 1080 area never less that we established a much larger walking zone. Actually the player behave is absolutely right, the problem is our camera. The camera scene is blocking the character to go beyond the limits of the purple rectangle field. The good news is that with Blade we can set the camera to follow one character player at a given moment (remember that the engine can handle multiple players!) in a simply step. Let try to do that.
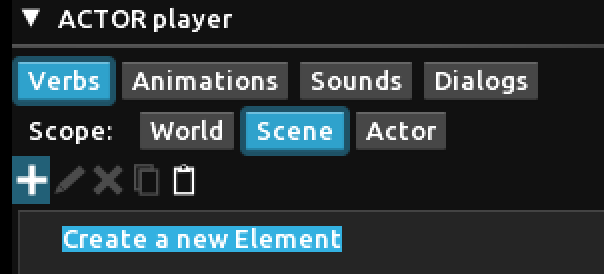
With the character player selected at the left side of the editor, select Verbs and click on Scene from the right side menu as in the image. After that click on add, + symbol, to add a new element.
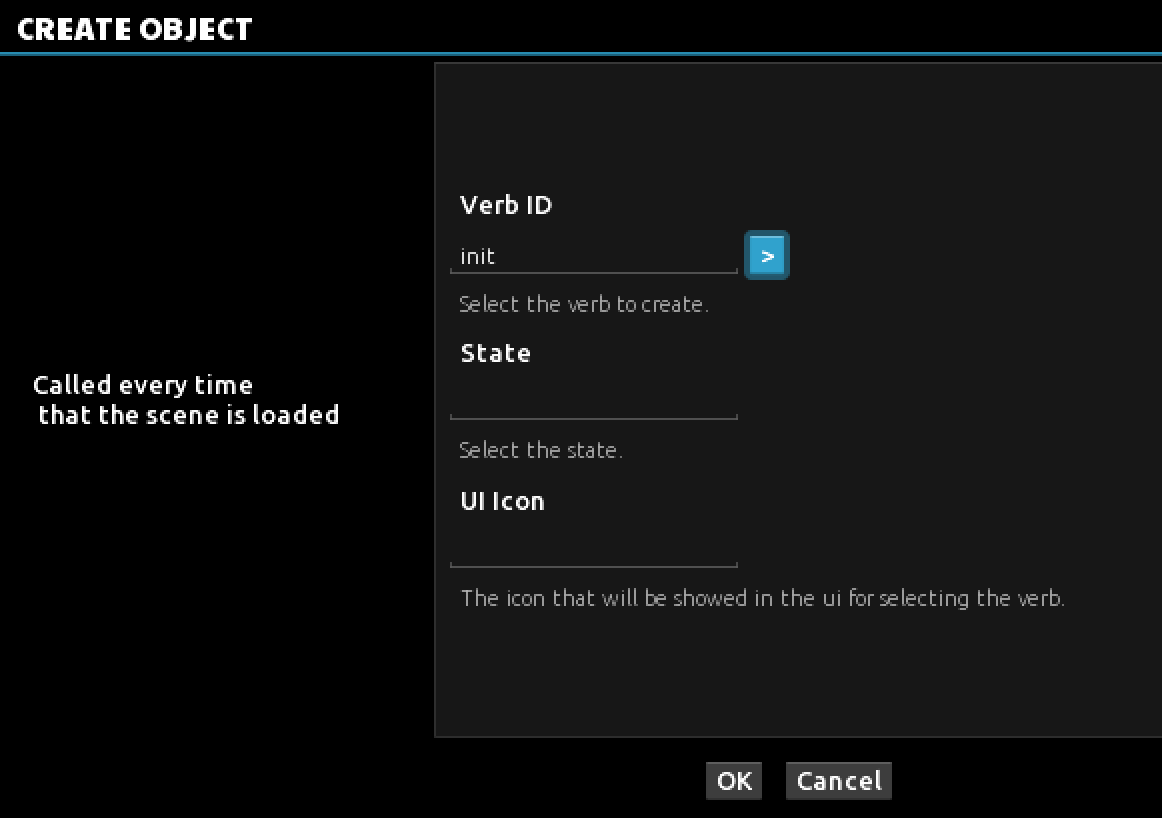
From the new window select the option init. This is an easy one as you have only two possibilities: init an test. The verb init is used to run a list of actions to set initial settings for the current scene. test is very similar, but is executed only when testing the scene, so is a handy way to check if our ideas will work in the current scene independent from the rest of the game we’re developing. So, with the verb init selected, hit OK to continue.
Now we should create a list of actions that will perform when the scene starts.
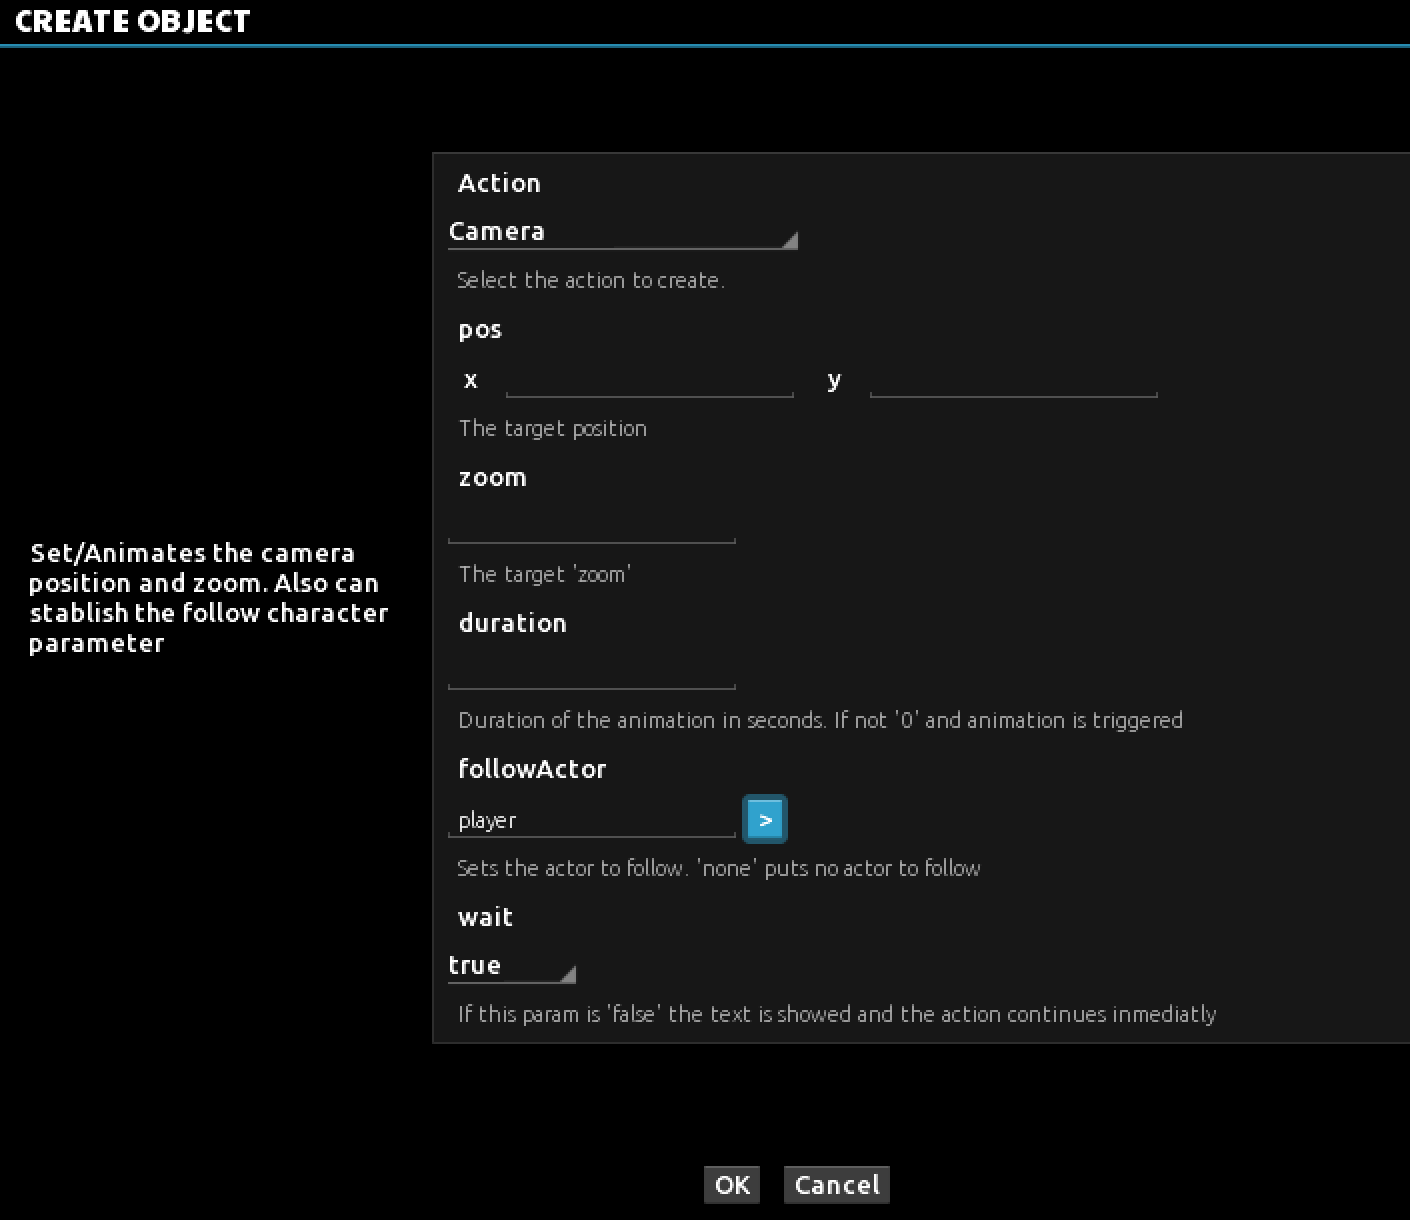
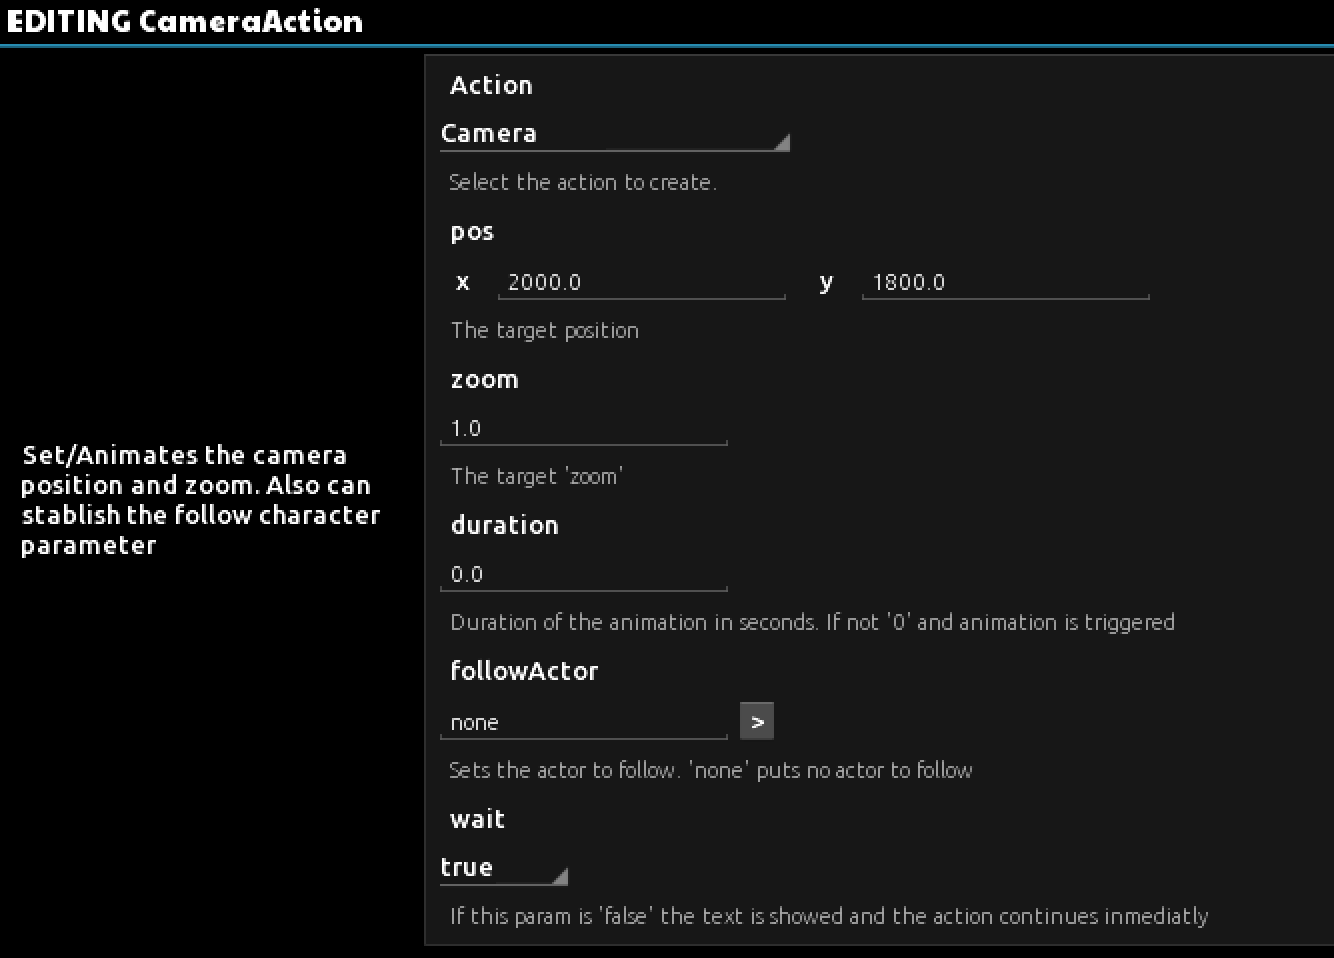
In this case, we want to modify the Camera behavior. To do this we need to use the Camera action.
Hit the + button from the bottom panel and add a Camera action. As we need a camera that follows our main character when he moves, be sure to have the Player actor selected into the followActor field. As you can see there’s more stuff to do with cameras using this same action. But for the time being just be sure to select followActor and click OK to set the parameters.
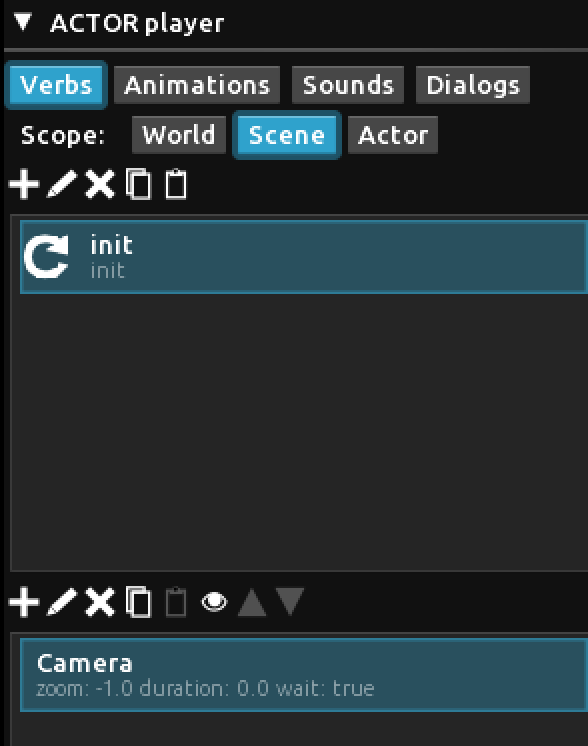
If you did well, the first action will shown as in the picture
The time to test our changes has come. Hit the Test button from the lower panel and make the player move to the right corner of the screen. The background image should scroll. Same thing if you go all the way up to the moon. Check if the walking zone boundaries are working fine. Fantastic!
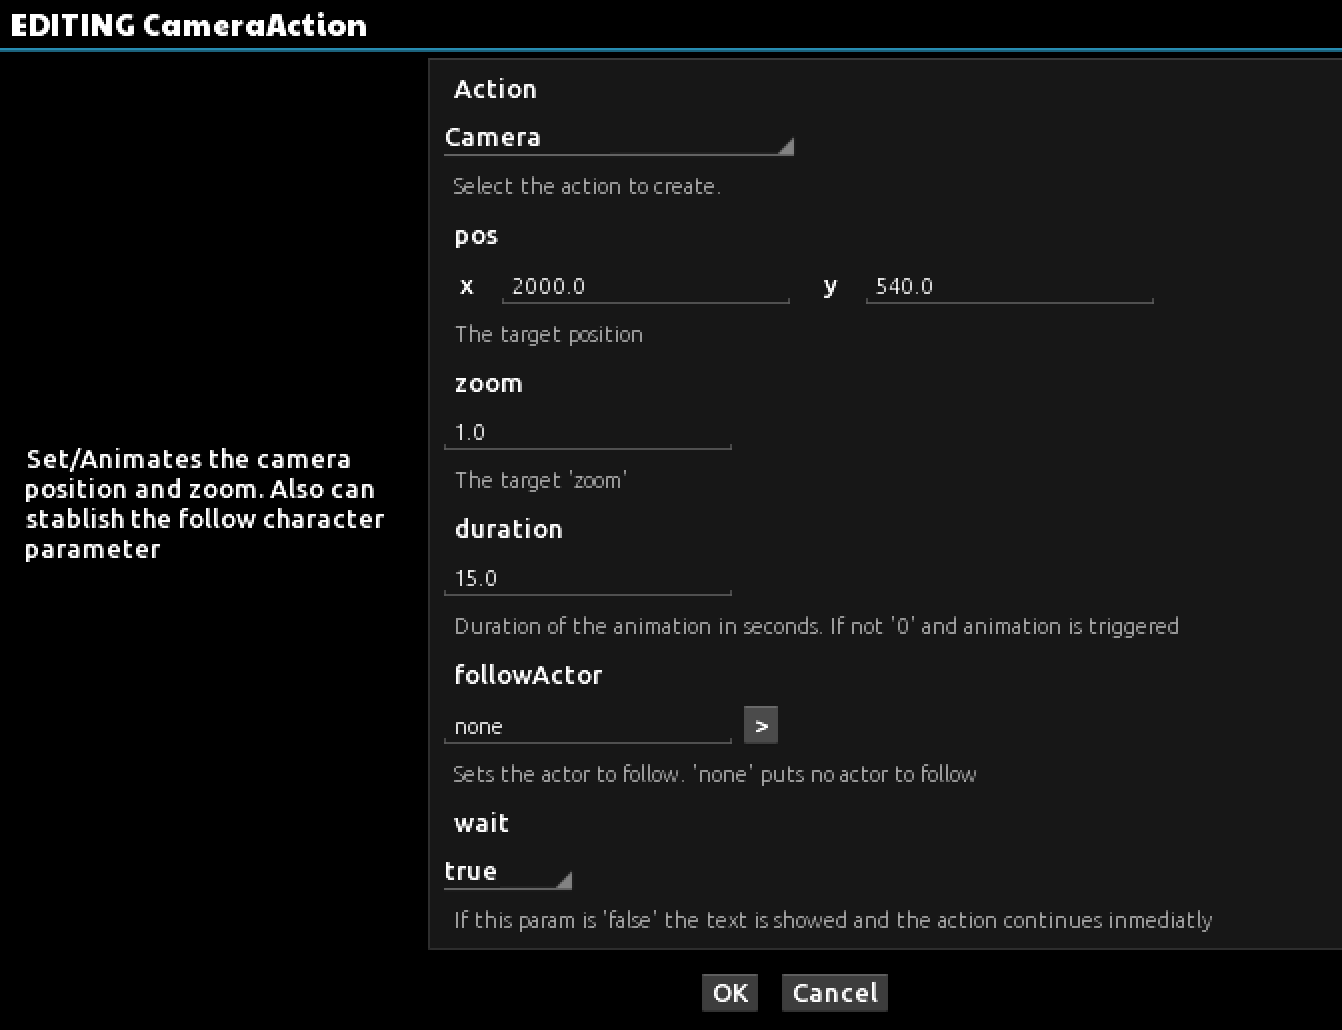
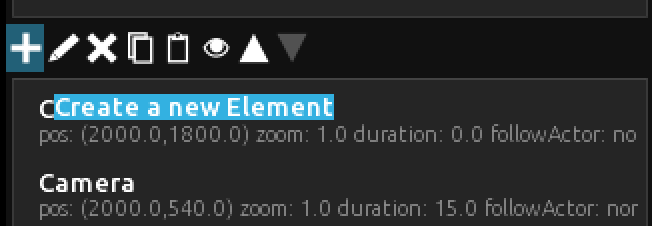
Now let’s take a look to another way to take advantage of the camera properties. One cool thing to do at the beginning of our game is to set up the mood of the scene by introducing the initial situation using a camera movement. By default our camera is pointing to the center of the standard scene (of a standard resolution of 1920 x 1080 px). But to achieve a pan we must set the camera at the top of the background image to make it move downwards. So put the player under the moon at the bottom of our stage like in the following picture, and edit the Camera action (using the pencil icon) to place it at the position X = 2000 and Y = 1800. In this same window put a zoom value of 1, a duration of 0 and in the followActor field write the word none (to avoid the camera following the player).
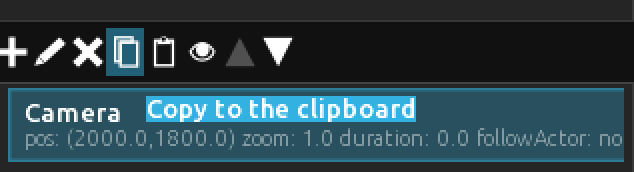
This step will put the camera at the top, now we need to add a similar action to make it move to the bottom. One handy trick to gain some speed you can duplicate the actual Camera action. Select it and click on the Copy to the clipboard icon and the click on the Paste from the clipboard.
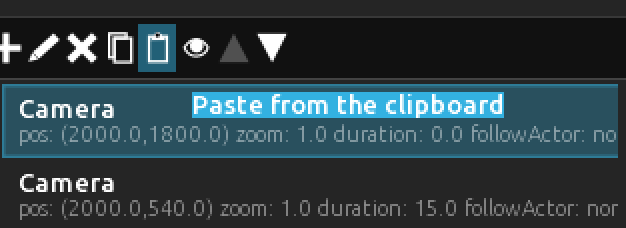
Finally we need to modify the second (pasted) Camera action properly.
Do it as follows: pos 2000 for X and 540 for Y (remember that vertical movements are associated to the Y axis, and horizontal ones corresponds to the X axis). Put the zoom factor to 1, and the Duration field to 15, this will set the speed of the movement (0 being the fastest). Keep the followActor to none and wait to true.
Now test the scene. If everything went right you should have a nice intro sequence!
As much as cool this intro goes, there’s still some place for improvement.
During an intro scene there’s no need to use the inventory (the little bag icon at the bottom of the screen), or the mouse cursor to avoid distracting the player. Here’s where the Cutmode action enters stage!
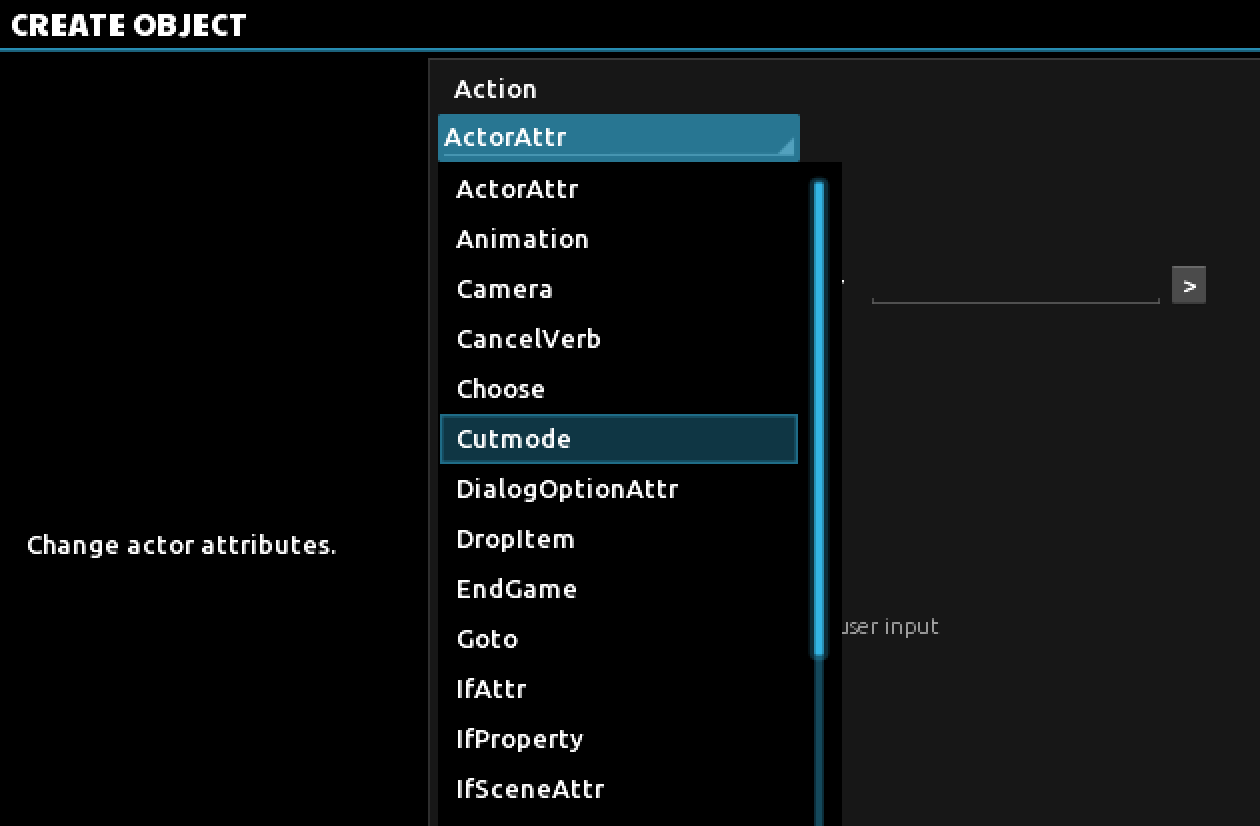
Go to the right menu and add a new action element with the pencil icon.
Choose the Cutmode action.
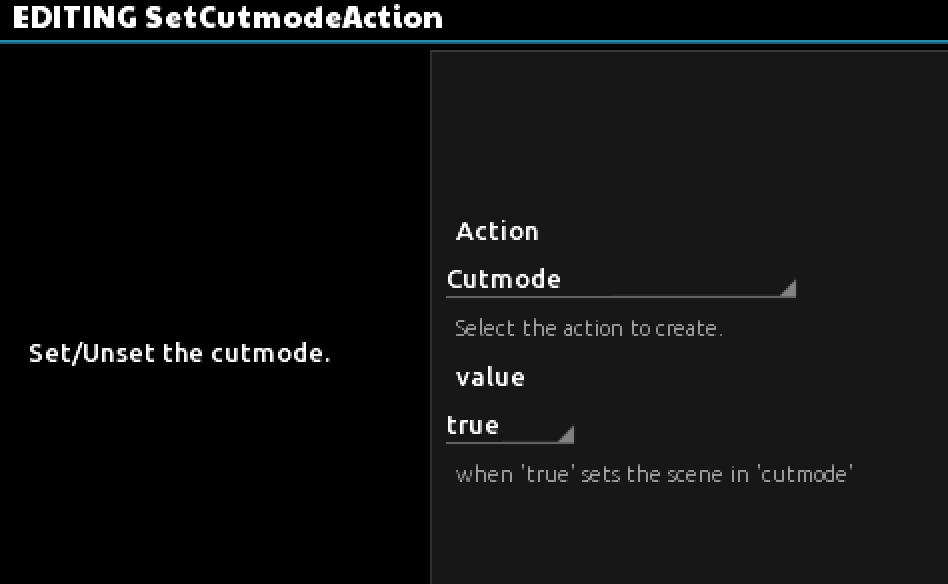
Set the Cutmode to true.
The Cutmode action works by pairs, so we need two of them, one to start blocking the interactions and another one at the end to re-establish the normal flow of the game. Every action we need to perform during the cutscene should be inside this two commands.
Now take a look at the action list.
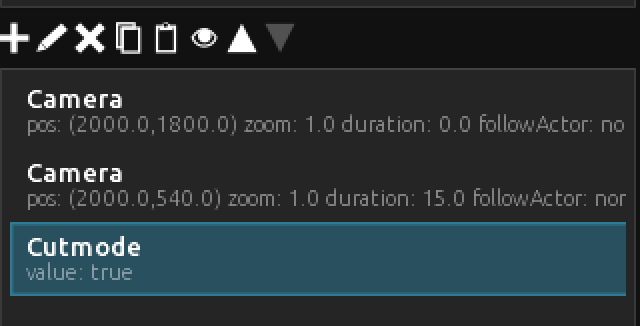
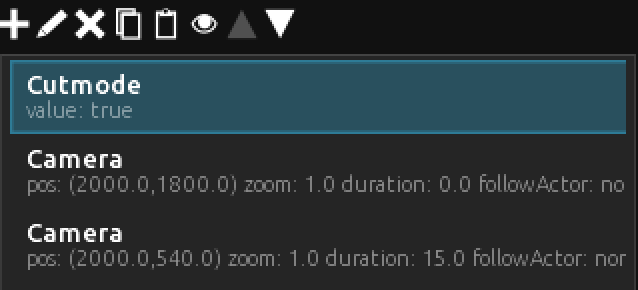
We need to put the camera movements after the Cutmode action, in order to do that, select the Cutmode verb and hit the up triangle icon to move it up in the list.

Like this:
Finally add a second Cutmode action, this time with a false value on it. Move the action to the end of the list to close the logic structure of events as follows:
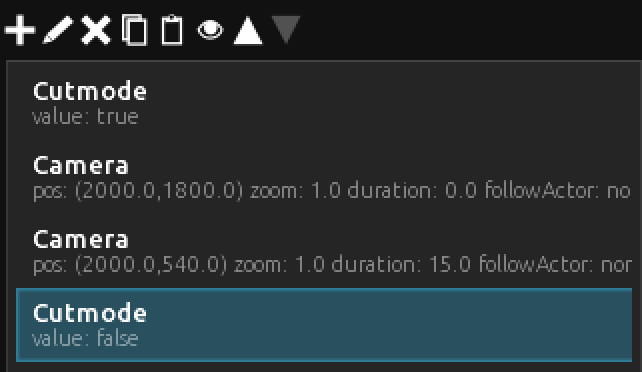
Remember that you can put any kind of actions between a true and a false cutmode structure. One Cutmode with true value activates the ‘auto’ mode and the false one concludes it, so the human player regains control of the game.
Check the performance of our intro sequence and try to perform a camera traveling using the same commands over the X axis.
This should give you enough fun until our next tutorial!